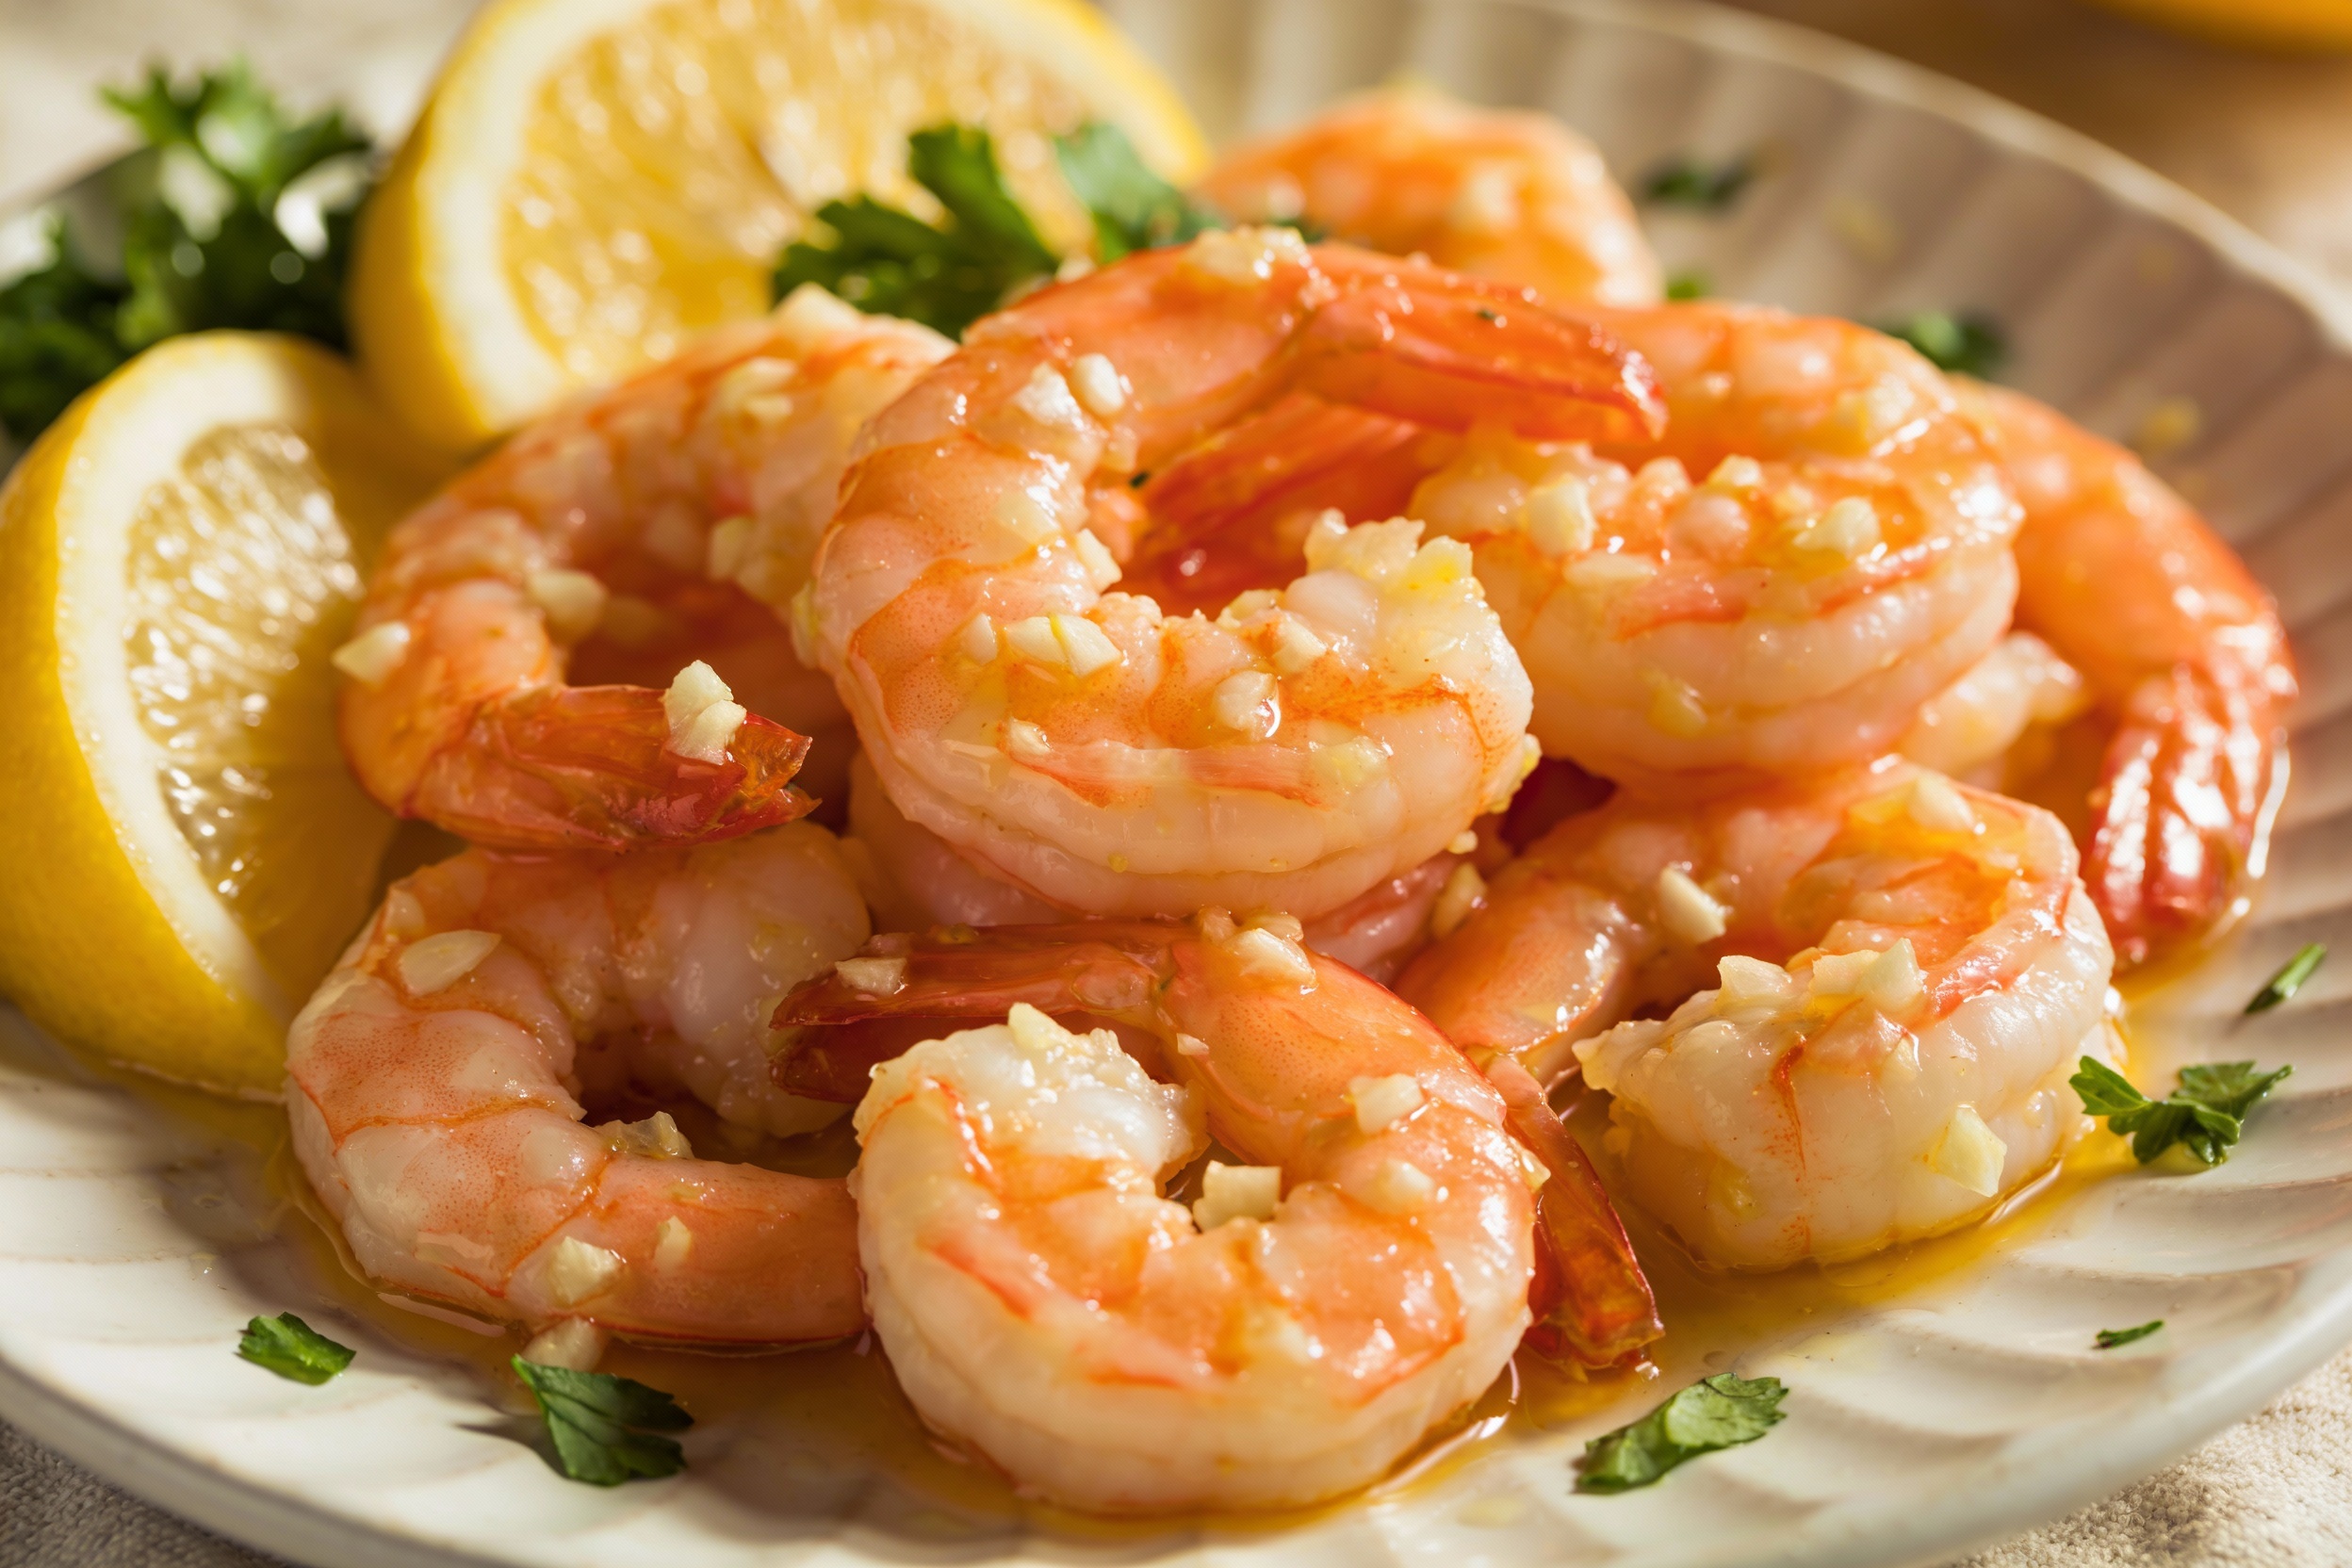
Lemon Garlic Shrimp
Shrimp cooks in minutes, which makes it either your weeknight hero or a fast track to rubbery disappointment. Lemon garlic shrimp walks the line beautifully: bright, buttery, and just garlicky enough to make your kitchen smell like you meant it. We’ll nail the timing, the sizzle, and the sauce so you get restaurant-level results without the tiny panic attack. Ready to get zesty?
FREE 7-Day Easy Dinner Reset
Get 7 healthy, family-friendly dinners complete with recipes and simple meal plans delivered straight to your inbox.
Why Lemon Garlic Shrimp Slaps
Shrimp loves bold flavors, and lemon plus garlic shows up like the fun friend who also brings snacks. The lemon cuts through the richness and keeps every bite bright. Garlic brings warmth and depth, then butter ties it all together like a glossy, salty bow.
You don’t need a culinary degree here, just a hot pan and decent shrimp. We’ll keep it simple, fast, and flexible. Dinner in 15 minutes? Absolutely.
Ingredients That Matter (and Why)

Let’s keep the list short and strategic. You need quality where it counts.
- Shrimp: 1 to 1.5 pounds, large (16–20 per pound), peeled and deveined. Tails on or off—your call.
- Garlic: 4–6 cloves, finely minced. No garlic powder here, please.
- Lemon: Zest and juice of 1 large lemon. Zest = perfume, juice = pop.
- Butter and olive oil: 2 tablespoons each. The combo prevents burning and adds flavor.
- Red pepper flakes: A pinch to a 1/2 teaspoon, depending on your spice level.
- Parsley: Fresh, chopped. Cilantro if you’re feeling rogue.
- Salt and pepper: Kosher salt and freshly cracked black pepper for best results.
Pro tip: Buy frozen wild shrimp if you can. Most “fresh” shrimp at the store thawed from frozen anyway, FYI.
Prep Like a Pro
You’ll finish cooking in minutes, so set the stage first.
- Thaw properly: Place frozen shrimp in a colander under cold running water for 10 minutes. Pat dry very well. Water = steam = sad sear.
- Zest before juicing: Zest the lemon first, then cut and juice it. You’ll thank me later.
- Mince your garlic finely: You want it to perfume the oil, not chunk up and burn.
- Season the shrimp: Toss with salt, pepper, and a pinch of red pepper flakes right before cooking.
About that dry shrimp surface…
Moisture prevents browning. Pat the shrimp with paper towels, then let them air out for a minute while the pan heats. You’ll get that golden edge instead of a pale shrug.
Fast, Hot, Done: The Cooking Game Plan

We keep the heat medium-high and the moves confident. You’ll cook in batches if needed to avoid crowding.
- Heat the pan: Large skillet on medium-high. Add olive oil and let it shimmer.
- Lay down the shrimp: One layer, flat side down. Don’t touch for 1–2 minutes. You want sizzle, not stir.
- Flip and finish: Flip each shrimp. Cook 1–2 minutes more. Remove to a plate when they turn pink and just curl.
- Make the sauce: Lower heat to medium. Add butter. When melted, add garlic and a pinch of red pepper flakes. Cook 30–45 seconds until fragrant—no browning.
- Brighten up: Add lemon juice and zest. Swirl. Season with salt and pepper.
- Reunite: Return shrimp and any juices to the pan. Toss to coat for 30 seconds. Finish with parsley. Done.
Visual cue: Perfect shrimp form a loose C-shape. Tight O-shape? You overshot it. Still edible, but IMO we aim higher.
Butter vs. Ghee vs. Olive Oil
– Butter tastes classic and luscious.
– Ghee handles heat like a champ and adds nuttiness.
– Olive oil keeps it lighter.
Use a mix for flavor plus high-heat flexibility—best of both worlds.
Make It Your Way
Shrimp invites customization. Here’s how to tweak without breaking the magic.
- Extra saucy: Add 1/4 cup dry white wine before the lemon juice. Let it reduce by half, then proceed.
- Herb swap: Try basil in summer or dill with a side of cucumbers. Thyme plays well too.
- Garlic level: Love it aggressive? Go 8 cloves, but mince finely and keep the heat moderate.
- Creamy spin: Stir in 2 tablespoons heavy cream at the end for a velvety finish.
- Dairy-free: Use all olive oil and finish with a knob of vegan butter or a splash of good olive oil off heat.
Add-ins That Actually Make Sense
– Cherry tomatoes blistered in the pan before the shrimp
– Thin asparagus or snap peas tossed in at the end
– Capers for briny energy
– Toasted panko for crunch on top (game-changer)
What to Serve With It

You basically have a flavor-packed protein that begs for a landing pad.
- Pasta: Linguine or angel hair tossed with olive oil and a ladle of pasta water. The sauce clings better.
- Rice: Jasmine or basmati for lightness. Orzo also slaps.
- Veggies: Roasted broccoli, zucchini ribbons, or a simple arugula salad with lemon and Parm.
- Bread: Crusty baguette to mop up the sauce. Don’t skip—the sauce deserves a victory lap.
The Pasta Trick You’ll Use Forever
Never Wonder What's For Dinner Again
Get 7 healthy, family-friendly dinners complete with recipes, grocery lists, and simple meal plans delivered straight to your inbox.
Reserve 1/2 cup pasta water. Toss your cooked pasta with the shrimp and sauce. Add splashes of pasta water until glossy. It bonds everything like culinary glue, FYI.
Timing and Texture: Read the Shrimp, Not the Clock
Shrimp size varies, so trust the signs.
- Color: Gray to pink with opaque white flesh.
- Curl: Loose C = tender. Tight O = overcooked.
- Surface: Light golden edges where it met the pan.
If you plan leftovers, undercook by 20–30 seconds in the pan. They’ll finish reheating gently later. No one wants bouncy erasers.
Seasoning Levels That Hit
– Salt the shrimp lightly pre-cook.
– Taste the sauce after lemon goes in. Then salt again if needed.
– Finish with fresh lemon juice if it tastes flat. Acid wakes it up instantly.
Meal Prep, Storage, and Reheating
You can cook ahead, but handle with care.
- Storage: Refrigerate in an airtight container up to 2 days.
- Reheat gently: Low heat in a skillet with a splash of water or broth for 1–2 minutes. Or microwave 45–60 seconds at 50% power.
- Eat cold: Toss chilled shrimp with arugula, avocado, and a lemony vinaigrette. Shockingly good.
Important: Add fresh parsley and a squeeze of lemon after reheating to revive the flavors.
FAQ
Can I use frozen pre-cooked shrimp?
You can, but the result won’t hit the same. Pre-cooked shrimp toughen quickly and don’t absorb sauce as well. If you must, gently warm them in the butter, garlic, and lemon mixture for 1 minute and call it a day.
What size shrimp works best?
Large or extra-large (16–20 or 21–25 per pound) gives you a meaty bite and more control over doneness. Smaller shrimp cook in a blink and overcook before you can blink again—fun for ceviche, not for pan-searing.
Can I make it spicy without blowing out the lemon?
Yes. Use red pepper flakes or a tiny spoon of Calabrian chili paste. They add warmth without smothering the citrus. Avoid heavy hot sauces that bring vinegar; the flavor balance gets messy, IMO.
Do I need to marinate the shrimp?
Nope. Shrimp takes on flavor fast, and acid can “cook” the surface prematurely. Season right before cooking, then let the sauce do the heavy lifting. If you want a quick pre-season, toss with garlic, lemon zest (not juice), and olive oil for 10 minutes max.
Why did my garlic burn?
Your pan ran too hot or the garlic hit a dry spot. Add butter, then garlic, and keep it moving for under a minute. If it turns brown, start over. Burnt garlic tastes bitter and will hijack the dish.
How do I make it gluten-free?
The shrimp itself is naturally gluten-free. Serve it with rice, polenta, or gluten-free pasta. Also check any stock or butter substitutes if you go that route.
Conclusion
Lemon garlic shrimp proves simple food can taste fancy with almost no effort. You heat the pan, you don’t crowd it, and you let lemon, garlic, and butter do the heavy lifting. Keep it hot, keep it quick, and finish with fresh herbs and extra lemon if you want that bright, clean pop. Dinner: done, delicious, and IMO dangerously repeatable.
Loved This Recipe?
If you're looking for more simple, healthy dinners your family will actually eat, grab my FREE 7-Day Easy Dinner Reset. You'll get 7 easy dinner recipes, simple grocery lists, and a done-for-you plan that takes the stress out of mealtime.