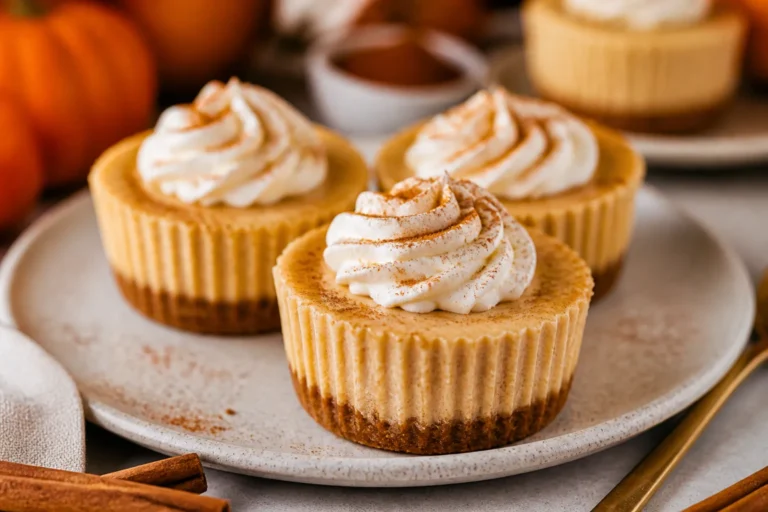
High Protein Low Carb Caramel Protein Cheesecake – Creamy, Light, and Satisfying
This cheesecake gives you all the creamy, rich flavor you want without the sugar crash. It’s smooth, indulgent, and full of protein to keep you satisfied. The caramel swirl brings a touch of sweetness that feels like dessert, not a “diet” recipe.
Whether you’re counting carbs or just want a smarter treat, this cheesecake fits the bill. It’s great for meal prep, special occasions, or a weeknight dessert you can feel good about.
High Protein Low Carb Caramel Protein Cheesecake - Creamy, Light, and Satisfying
Ingredients
Method
- Prep your pan and oven. Preheat the oven to 325°F (163°C). Line the bottom of an 8-inch or 9-inch springform pan with parchment. Lightly grease the sides. Wrap the outside with a double layer of foil if you plan to use a water bath.
- Make the crust. In a bowl, mix almond flour, melted butter, sweetener, vanilla, and a pinch of salt until it holds together like damp sand. Press the mixture firmly into the bottom of the pan in an even layer. Bake for 8–10 minutes until lightly golden. Let it cool while you make the filling.
- Soften and smooth the cream cheese. In a large bowl, beat the cream cheese with a hand mixer on medium speed for 1–2 minutes until smooth. Scrape the bowl well to avoid lumps.
- Add yogurt and sweetener. Beat in the Greek yogurt, sweetener, vanilla, and salt until fully combined and silky. Keep the speed on low to minimize air bubbles.
- Blend in the protein powder. Add protein powder and mix on low just until incorporated. If the batter seems too thick, add almond milk 1 tablespoon at a time until it’s pourable but still thick.
- Add the eggs. Beat in the eggs one at a time on low speed, just until combined. Do not overmix. Overmixing can cause cracks.
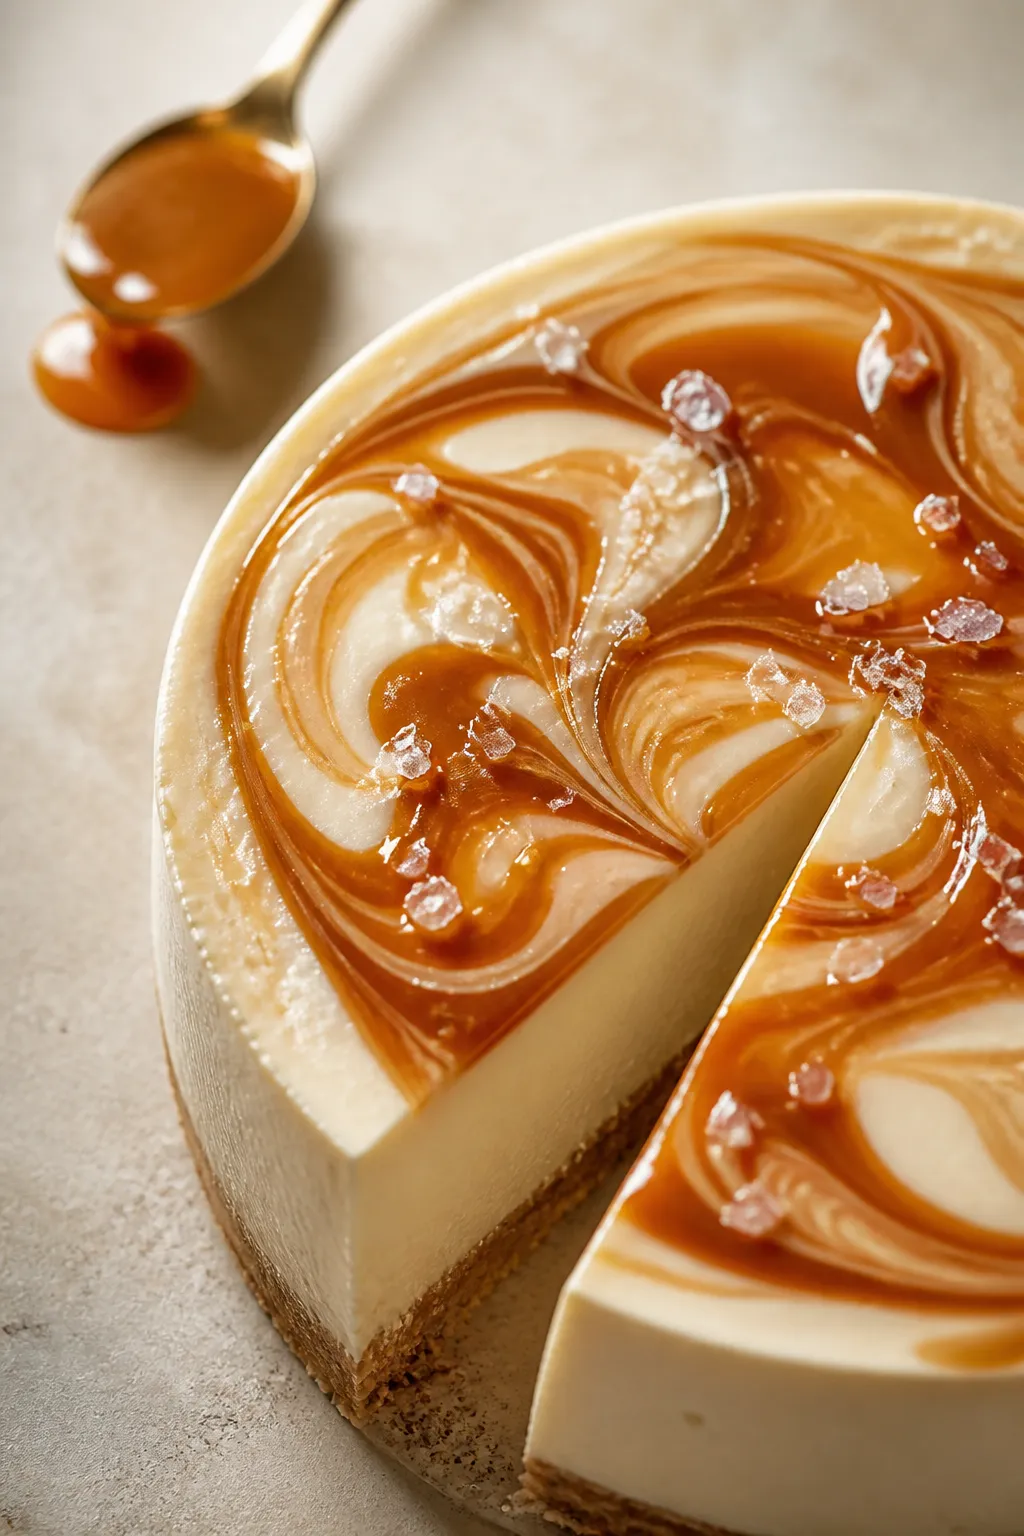
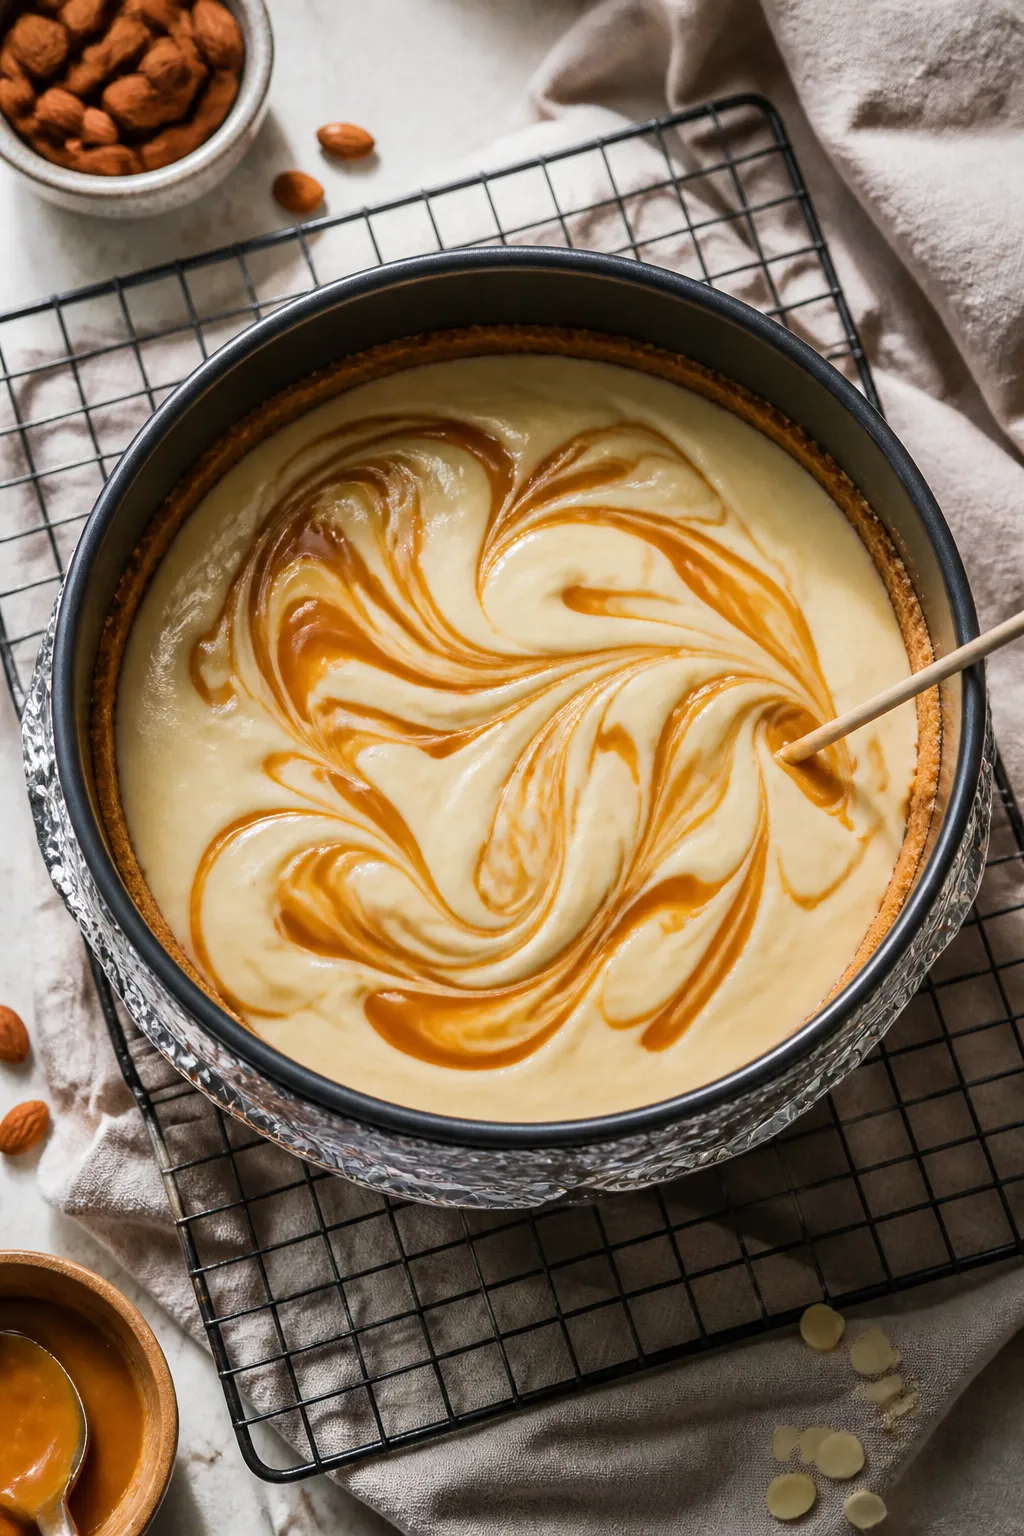
- Assemble with caramel. Pour half the batter over the cooled crust. Drizzle a few tablespoons of sugar-free caramel over the surface and use a skewer to swirl lightly. Add the remaining batter and repeat with more caramel swirls on top.
- Set up the bake. For the most even texture, place the springform pan in a larger roasting pan. Pour hot water into the roasting pan to reach halfway up the sides of the springform. If skipping the water bath, just place the cheesecake directly on the oven rack.
- Bake. Bake at 325°F (163°C) for 45–60 minutes, depending on pan size. The edges should be set, and the center should jiggle slightly like Jell-O when you nudge the pan.
- Cool gently. Turn off the oven, crack the door, and let the cheesecake sit for 30 minutes. Remove from the oven and water bath. Run a thin knife around the edge to release it. Cool to room temperature.
- Chill to set. Cover and refrigerate for at least 6 hours, preferably overnight. This step ensures the texture firms up and the flavors blend.
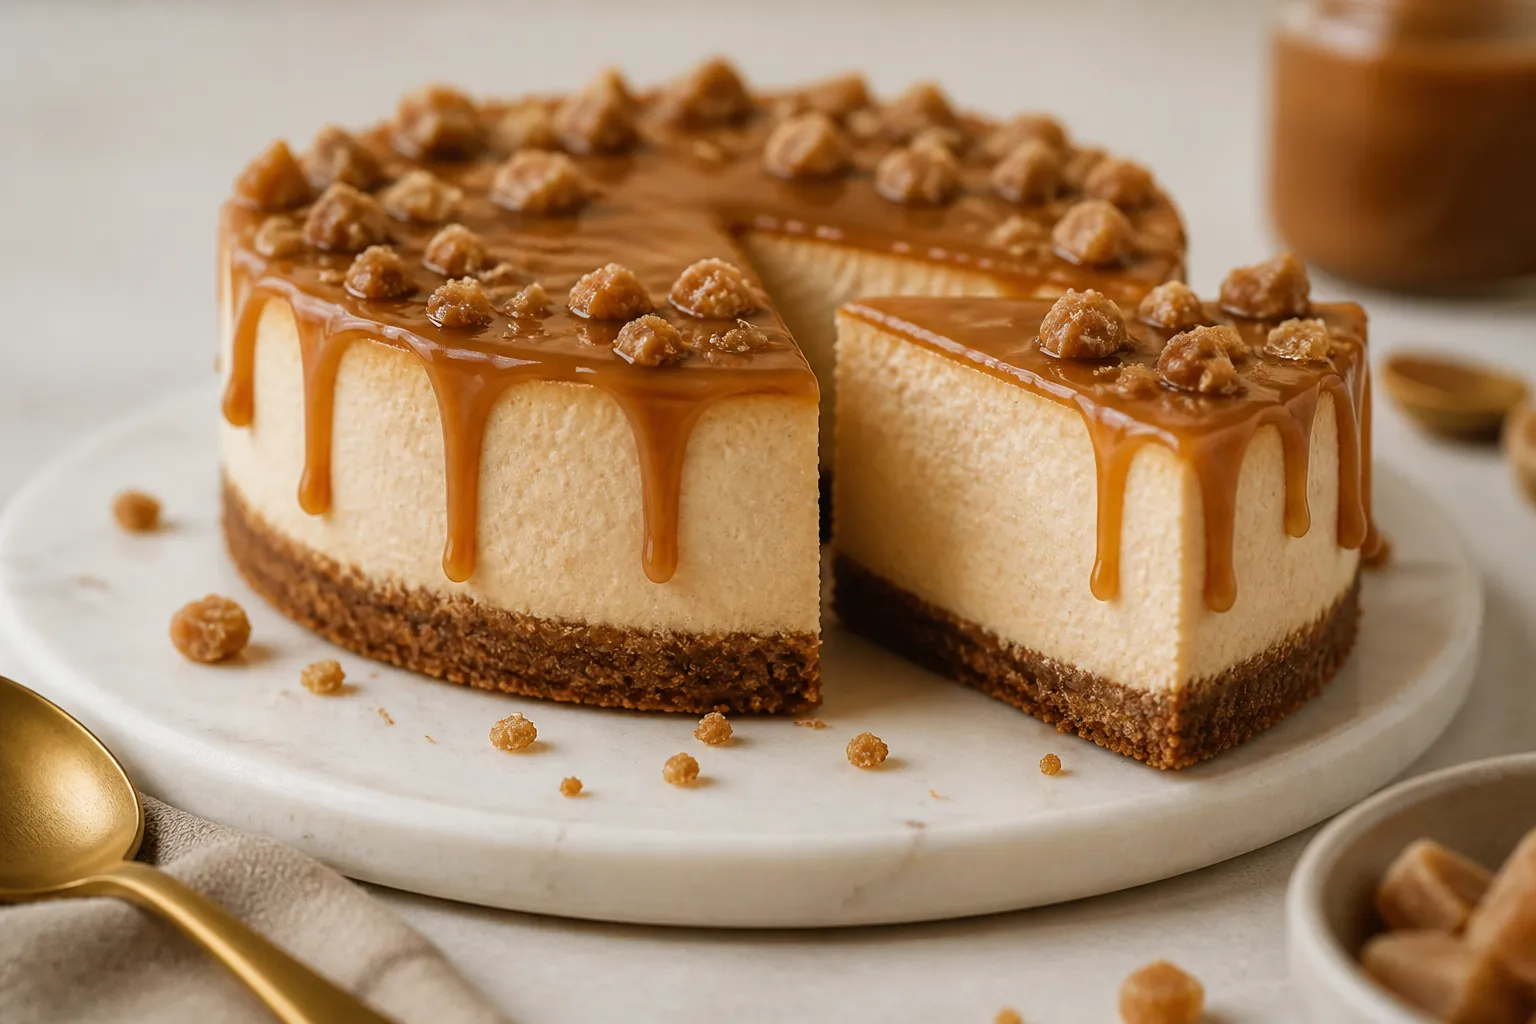
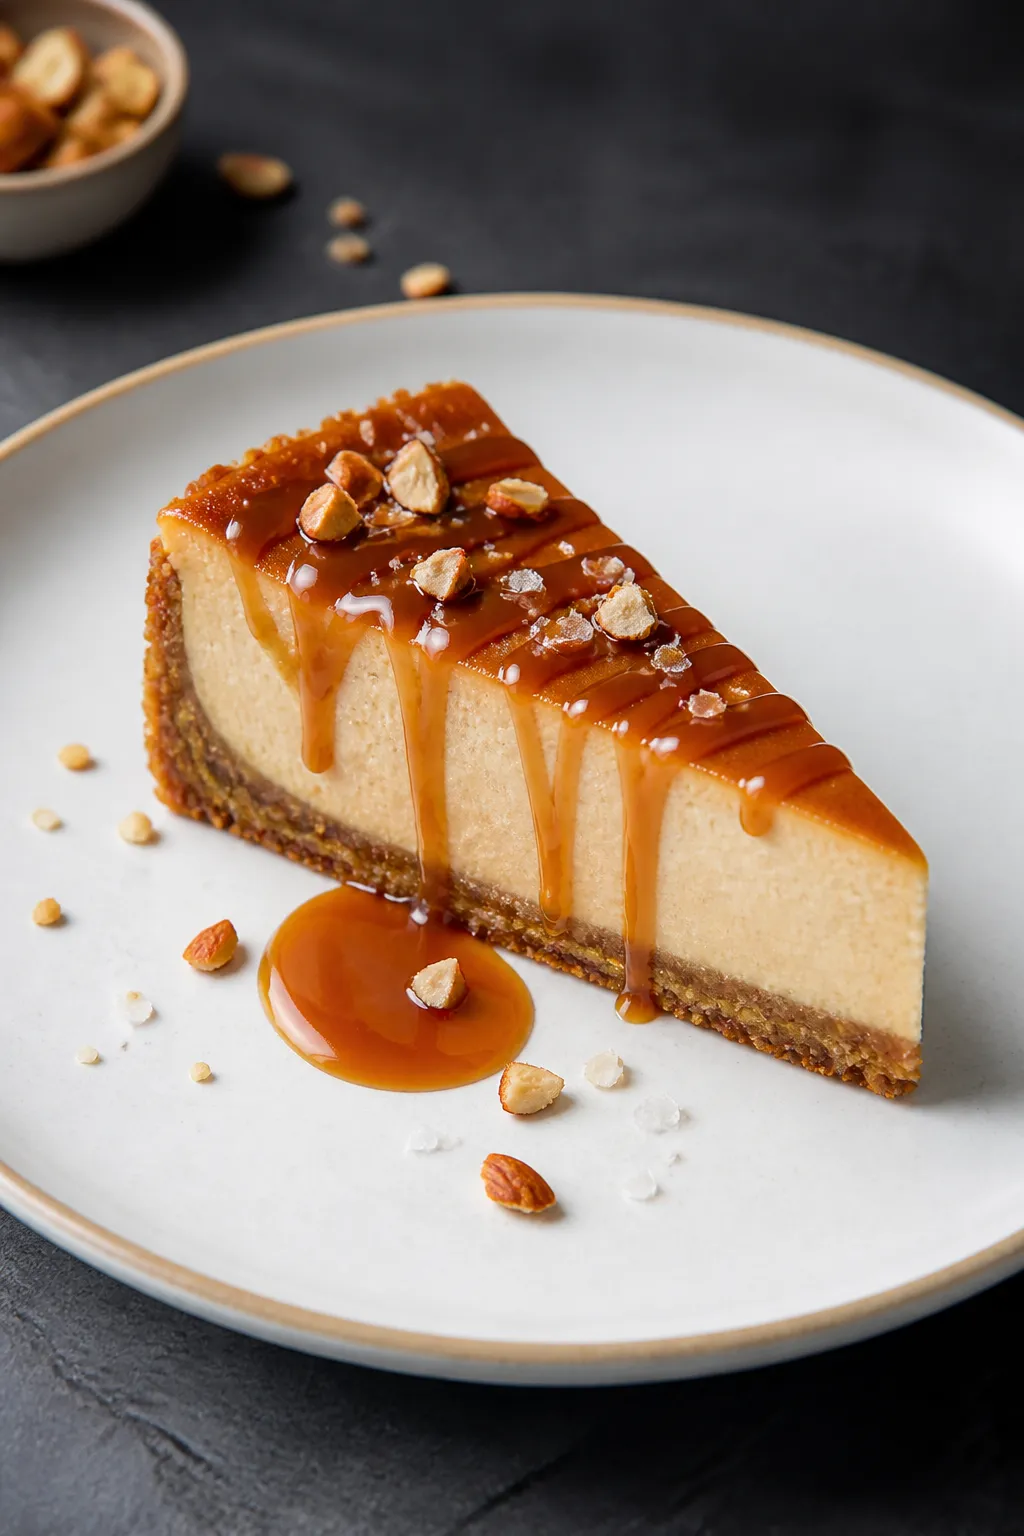
- Finish and serve. Right before serving, drizzle with extra sugar-free caramel and a pinch of flaky sea salt if you like. Slice with a hot, clean knife for neat edges.

Why This Recipe Works
This cheesecake uses a blend of light cream cheese and Greek yogurt to keep it creamy while boosting protein. A touch of whey or casein protein powder adds structure and richness without drying it out.
The almond flour crust keeps carbs down and toasts up beautifully. Using a water bath (or a lower oven temperature) helps prevent cracks and keeps the filling silky. The sugar-free caramel sauce ties it all together with just the right amount of sweetness.
Ingredients
- For the crust:
- 1 1/2 cups fine almond flour
- 3 tablespoons melted unsalted butter (or coconut oil)
- 2 tablespoons granular monk fruit or erythritol sweetener
- 1 teaspoon vanilla extract
- Pinch of salt
- For the filling:
- 16 ounces light cream cheese, softened to room temperature
- 1 cup plain nonfat or low-fat Greek yogurt
- 2 large eggs, room temperature
- 1/2 cup vanilla whey or casein protein powder (or unflavored)
- 1/2 cup granular or powdered monk fruit/erythritol blend
- 2 teaspoons vanilla extract
- 1/4 teaspoon salt
- 2–3 tablespoons unsweetened almond milk (as needed for texture)
- For the caramel swirl/topping:
- 1/2 cup sugar-free caramel sauce (store-bought or homemade)
- Flaky sea salt for finishing (optional)
Step-by-Step Instructions
- Prep your pan and oven. Preheat the oven to 325°F (163°C).
Line the bottom of an 8-inch or 9-inch springform pan with parchment. Lightly grease the sides. Wrap the outside with a double layer of foil if you plan to use a water bath.
- Make the crust. In a bowl, mix almond flour, melted butter, sweetener, vanilla, and a pinch of salt until it holds together like damp sand.
Press the mixture firmly into the bottom of the pan in an even layer. Bake for 8–10 minutes until lightly golden. Let it cool while you make the filling.
- Soften and smooth the cream cheese. In a large bowl, beat the cream cheese with a hand mixer on medium speed for 1–2 minutes until smooth.
Scrape the bowl well to avoid lumps.
- Add yogurt and sweetener. Beat in the Greek yogurt, sweetener, vanilla, and salt until fully combined and silky. Keep the speed on low to minimize air bubbles.
- Blend in the protein powder. Add protein powder and mix on low just until incorporated. If the batter seems too thick, add almond milk 1 tablespoon at a time until it’s pourable but still thick.
- Add the eggs. Beat in the eggs one at a time on low speed, just until combined.
Do not overmix. Overmixing can cause cracks.
- Assemble with caramel. Pour half the batter over the cooled crust. Drizzle a few tablespoons of sugar-free caramel over the surface and use a skewer to swirl lightly.
Add the remaining batter and repeat with more caramel swirls on top.
- Set up the bake. For the most even texture, place the springform pan in a larger roasting pan. Pour hot water into the roasting pan to reach halfway up the sides of the springform. If skipping the water bath, just place the cheesecake directly on the oven rack.
- Bake. Bake at 325°F (163°C) for 45–60 minutes, depending on pan size.
The edges should be set, and the center should jiggle slightly like Jell-O when you nudge the pan.
- Cool gently. Turn off the oven, crack the door, and let the cheesecake sit for 30 minutes. Remove from the oven and water bath. Run a thin knife around the edge to release it.
Cool to room temperature.
- Chill to set. Cover and refrigerate for at least 6 hours, preferably overnight. This step ensures the texture firms up and the flavors blend.
- Finish and serve. Right before serving, drizzle with extra sugar-free caramel and a pinch of flaky sea salt if you like. Slice with a hot, clean knife for neat edges.
Keeping It Fresh
Store the cheesecake covered in the fridge for up to 5 days.
For longer storage, slice and freeze individual portions. Wrap each slice tightly, then place in a freezer bag or airtight container. Thaw overnight in the fridge, or at room temperature for 30–45 minutes.
Add a fresh drizzle of caramel after thawing for the best look and taste.
Benefits of This Recipe
- High protein, low carb. The combination of Greek yogurt, cream cheese, and protein powder supports satiety and keeps sugar low.
- Great texture without heavy cream. You get a creamy, New York-style feel using lighter ingredients.
- Meal-prep friendly. One bake gives you multiple servings that hold well through the week.
- Customizable sweetness. Adjust the sweetener level and caramel drizzle to fit your taste and goals.
- Gluten-free crust. Almond flour keeps carbs down and adds a subtle nutty flavor.
Pitfalls to Watch Out For
- Overmixing the batter. Too much air leads to cracks. Mix on low and stop when combined.
- Skipping room-temperature dairy. Cold ingredients clump and create a lumpy filling. Let them warm up first.
- Overbaking. If the center is fully set in the oven, it’s overdone.
Pull it while it still jiggles slightly.
- Not cooling gradually. Rapid temperature changes can cause cracks. Use the oven-cooling step.
- Using too much caramel in the batter. Heavy swirls can sink or cause weeping. Light drizzles work best; save extra for the top.
Recipe Variations
- Salted Caramel Pretzel Crunch. Add a thin layer of crushed low-carb pretzels to the crust and finish with flaky sea salt.
- Chocolate Caramel Marble. Swap half the protein powder for chocolate, and swirl with both caramel and a few lines of melted dark chocolate (sugar-free if preferred).
- Espresso Caramel. Add 1–2 teaspoons instant espresso to the batter for a coffeehouse vibe.
- Mini Cheesecakes. Bake in a lined muffin tin for 16–20 minutes.
Great for portion control and faster chilling.
- No-Bake Shortcut. Use the same crust, but toast it in a skillet and press into the pan. Whip the filling without eggs, add 1 teaspoon gelatin bloomed in 2 tablespoons hot water, chill 6–8 hours.
FAQ
Can I use full-fat cream cheese instead of light?
Yes. Full-fat cream cheese will make the cheesecake richer and even creamier.
It may add a few more calories and fat, but the recipe works the same.
What protein powder works best?
Whey or a whey-casein blend gives the creamiest texture. Casein alone also works well. If using plant-based protein, start with 1/3 cup and add almond milk as needed because it absorbs more liquid.
Can I make it without a water bath?
Yes.
Bake at 300–315°F (150–157°C) for a little longer to reduce the risk of cracking. Cool slowly in the oven with the door cracked for best results.
How do I prevent a grainy texture?
Use room-temperature dairy, mix on low, and scrape the bowl often. Powdered sweetener dissolves more easily than granular and can help keep the filling smooth.
Is the almond flour crust necessary?
No.
You can go crustless. Grease the pan well, pour in the filling, and bake as directed. The carbs drop further and the edges get a nice custardy bite.
How many servings does this make?
Typically 10–12 slices from a 9-inch pan, or 8–10 from an 8-inch.
For macros, divide your total ingredients by the number of slices you cut.
Can I use another sweetener?
Allulose, erythritol blends, or monk fruit blends work well. Allulose browns more and makes a softer texture, while erythritol adds more structure. Adjust to taste.
What if my cheesecake cracks?
It still tastes great.
Cover with caramel and a sprinkle of sea salt. Next time, reduce mixing, bake a little less, or cool more gradually.
How long should I chill it?
At least 6 hours, but overnight is best. The texture improves significantly with a long chill.
Can I make it dairy-free?
Use a dairy-free cream cheese and a thick coconut or almond yogurt, plus a plant-based protein.
Expect a slightly different texture, but it will still set nicely.
Wrapping Up
This High Protein Low Carb Caramel Protein Cheesecake brings the best of both worlds: classic cheesecake comfort and a macro-friendly profile. It’s simple to make, easy to adapt, and great for sharing or stashing in the freezer. Keep it on your short list for smarter desserts that don’t feel like a compromise.
One slice, and you’ll see why this recipe sticks around.
Printable Recipe Card
Want just the essential recipe details without scrolling through the article? Get our printable recipe card with just the ingredients and instructions.