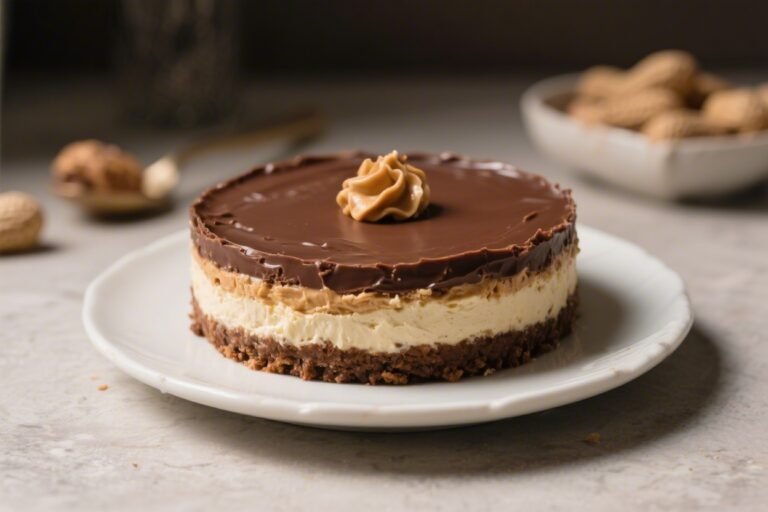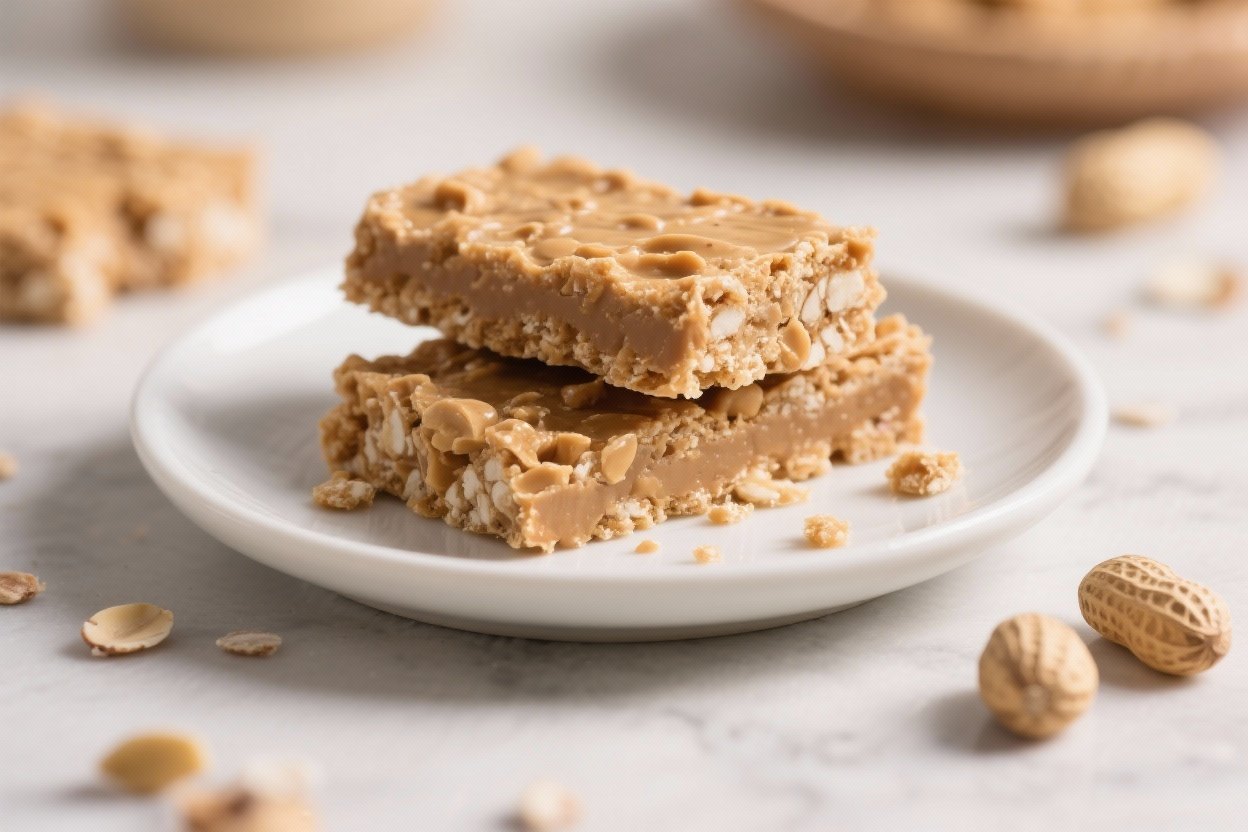
Healthy No-Bake Peanut Butter Bars That Taste Like Dessert and Perform Like a Protein Bar
You want a snack that hits like candy but treats your body like a top-tier athlete’s? These Healthy No-Bake Peanut Butter Bars are the cheat code. No oven.
FREE 7-Day Easy Dinner Reset
Get 7 healthy, family-friendly dinners complete with recipes and simple meal plans delivered straight to your inbox.
No nonsense. Just rich, peanut buttery squares that set faster than your next craving and deliver real fuel, not fluff. Perfect for busy mornings, post-workout refuels, or the “don’t make me turn on the oven” crowd.
Make a batch once, thank yourself all week.
Why This Recipe Works

These bars lean on whole-food fat and fiber to keep you full and energized without a sugar crash. The base blends creamy peanut butter, oats, and a touch of natural sweetness for a chewy, luscious texture that doesn’t crumble apart. The optional chocolate top adds a crisp snap and a “wow, that’s dessert” finish—without turning your kitchen into a bakery.
They’re no-bake, 5–10 minutes of active work, and endlessly customizable.
Swap nuts, change the sweetener, add protein—these bars don’t complain. They just deliver.
Ingredients
- 1 cup natural creamy peanut butter (no added sugar if possible)
- 1/3 cup pure maple syrup or honey
- 2 tablespoons melted coconut oil (or unsalted butter)
- 1 1/2 cups old-fashioned rolled oats (quick oats also work; see notes)
- 1/2 cup fine almond flour (or oat flour)
- 1 teaspoon vanilla extract
- 1/4 teaspoon fine sea salt (reduce if peanut butter is salted)
- Optional add-ins: 2–3 tablespoons chia seeds or ground flaxseed; 1/4 cup mini dark chocolate chips; 1/4 cup chopped peanuts
- Optional chocolate topping: 3/4 cup dark chocolate chips + 1 tablespoon coconut oil
- Optional protein boost: 1–2 scoops unflavored or vanilla protein powder (whey or plant-based); adjust moisture as needed
Let’s Get Cooking – Instructions

- Prep the pan: Line an 8×8-inch pan with parchment, leaving overhang for easy lifting. This saves your sanity later.
- Warm the wet ingredients: In a medium saucepan over low heat, stir peanut butter, maple syrup, and coconut oil until smooth and glossy, 1–2 minutes.
Remove from heat and stir in vanilla.
- Build the base: Add oats, almond flour, and salt to the pot. Mix until fully combined. If using protein powder, add now and stir; if the mixture gets too thick, splash in 1–2 teaspoons of water or almond milk.
- Fold in extras: Stir in chia/flax, mini chips, or chopped peanuts.
Keep it balanced—this is a bar, not trail mix trying to escape.
- Press to impress: Transfer mixture to the lined pan. Press firmly and evenly with a spatula or the bottom of a measuring cup. Compacting = clean slices.
- Optional chocolate top: Microwave chocolate chips with 1 tablespoon coconut oil in 20–30 second bursts, stirring until smooth.
Pour over the base and tilt the pan to coat.
- Set the standard: Chill in the fridge for 45–60 minutes (or freezer for 20) until firm.
- Slice and store: Lift out using the parchment, cut into 12–16 bars, and stash as directed below. Try not to “taste test” half the batch. Or do.
Your call.
How to Store
- Fridge: Store in an airtight container up to 10 days. They’ll keep a pleasantly chewy texture.
- Freezer: Freeze individually wrapped bars for up to 3 months. Thaw at room temp for 10–15 minutes or in the fridge overnight.
- On-the-go: For lunchboxes, wrap and keep with an ice pack.
Without chocolate topping, they travel better in warm weather.

Why This is Good for You
Balanced macros: Peanut butter brings satisfying fats and protein; oats and almond flour pack fiber and slow-digesting carbs. Translation: steady energy, fewer snack attacks.
Smart sweetness: Maple syrup or honey provides flavor with fewer spikes than refined sugar when paired with fats and fiber. You’ll feel nourished, not wired.
Micronutrients: Oats deliver beta-glucan for heart health; nuts and seeds add vitamin E, magnesium, and omega-3s (if you throw in flax/chia).
That’s stealth nutrition.
Gluten-friendly and dairy-light: Use certified gluten-free oats and plant protein to keep it friendly for more people. FYI, it still tastes like a treat.
Don’t Make These Errors
- Using dry peanut butter without adjusting: If your PB is extra thick, add 1–2 teaspoons more coconut oil or a splash of milk. Crumbly bars are not the vibe.
- Skipping the press: Not compacting the mixture leads to bars that fall apart.
Press firmly, especially at the edges.
- Overloading add-ins: Cap total extras at about 1/2 cup. Too many mix-ins = structural chaos.
- Cutting too soon: Warm bars smear and break. Let them set fully before slicing, hero.
- Wrong oats, wrong texture: Steel-cut oats are a hard no.
Use rolled or quick oats. If using quick oats, you may need 2–3 tablespoons less almond flour.
- Neglecting salt: A pinch wakes up the flavor. Bland bars are avoidable.
Variations You Can Try
- PB&J Swirl: Marble 2–3 tablespoons of reduced-sugar raspberry jam into the pressed base before chilling.
Nostalgia unlocked.
- Mocha Crunch: Add 1 tablespoon finely ground espresso and 1/4 cup cacao nibs. Finish with a dark chocolate top. You’re welcome.
- High-Protein: Add 1–2 scoops protein powder and 1–3 extra teaspoons liquid (as needed).
Great post-gym or pre-email gauntlet.
- Nut-Free: Use sunflower seed butter and omit almond flour in favor of oat flour. Tastes like a cookie, plays well with allergies.
- Salted Caramel Vibes: Use honey + a sprinkle of flaky sea salt on the chocolate layer. Sweet-savory perfection.
- Coconut Almond Joy: Fold in 1/3 cup unsweetened shredded coconut and use almond butter.
Optional almond slivers on top for crunch.
FAQ
Can I make these without coconut oil?
Never Wonder What's For Dinner Again
Get 7 healthy, family-friendly dinners complete with recipes, grocery lists, and simple meal plans delivered straight to your inbox.
Yes. Swap with unsalted butter or a neutral nut/seed oil. If omitting entirely, the bars may be softer; adjust with 1–2 extra tablespoons almond flour or chill longer.
What if my bars are too crumbly?
They likely need more moisture or more pressing.
Warm a tablespoon of peanut butter with a spoon of maple syrup, mix into the bowl, and re-press. Also ensure they chilled fully before slicing.
Can I reduce the sweetener?
Absolutely. Cut to 1/4 cup and add 1–2 teaspoons milk if the mixture gets stiff.
Flavor will be less dessert-like but still satisfying. IMO, 1/3 cup is the sweet spot for most palates.
Do I have to add the chocolate topping?
Nope. The bars are great without it and more travel-friendly in heat.
If you want a lighter touch, drizzle instead of full coverage.
How do I make them gluten-free?
Use certified gluten-free oats and choose a GF protein powder if adding. Everything else in the base is naturally gluten-free.
What protein powder works best?
Whey blends in the smoothest; plant proteins absorb more liquid. Start with 1 scoop, then adjust texture with a splash of milk if needed.
Can I use steel-cut oats?
No.
They stay hard and unpleasant. Stick to rolled or quick oats for that soft-chewy vibe.
How many bars does this make?
In an 8×8 pan, you’ll get 12 generous bars or up to 16 smaller squares. For meal prep, I like 12—big enough to count as a real snack.
Wrapping Up
These Healthy No-Bake Peanut Butter Bars pack flavor, convenience, and legit nutrition into one pan.
Five to ten minutes of effort buys you a week of grab-and-go wins—no oven, no drama. Customize them to your goals, keep a stash cold, and watch your snack game glow up. Because great habits should taste amazing, too.
Now go press greatness into a pan and claim your next energy boost, one peanutty square at a time.
Printable Recipe Card
Want just the essential recipe details without scrolling through the article? Get our printable recipe card with just the ingredients and instructions.
Loved This Recipe?
If you're looking for more simple, healthy dinners your family will actually eat, grab my FREE 7-Day Easy Dinner Reset. You'll get 7 easy dinner recipes, simple grocery lists, and a done-for-you plan that takes the stress out of mealtime.