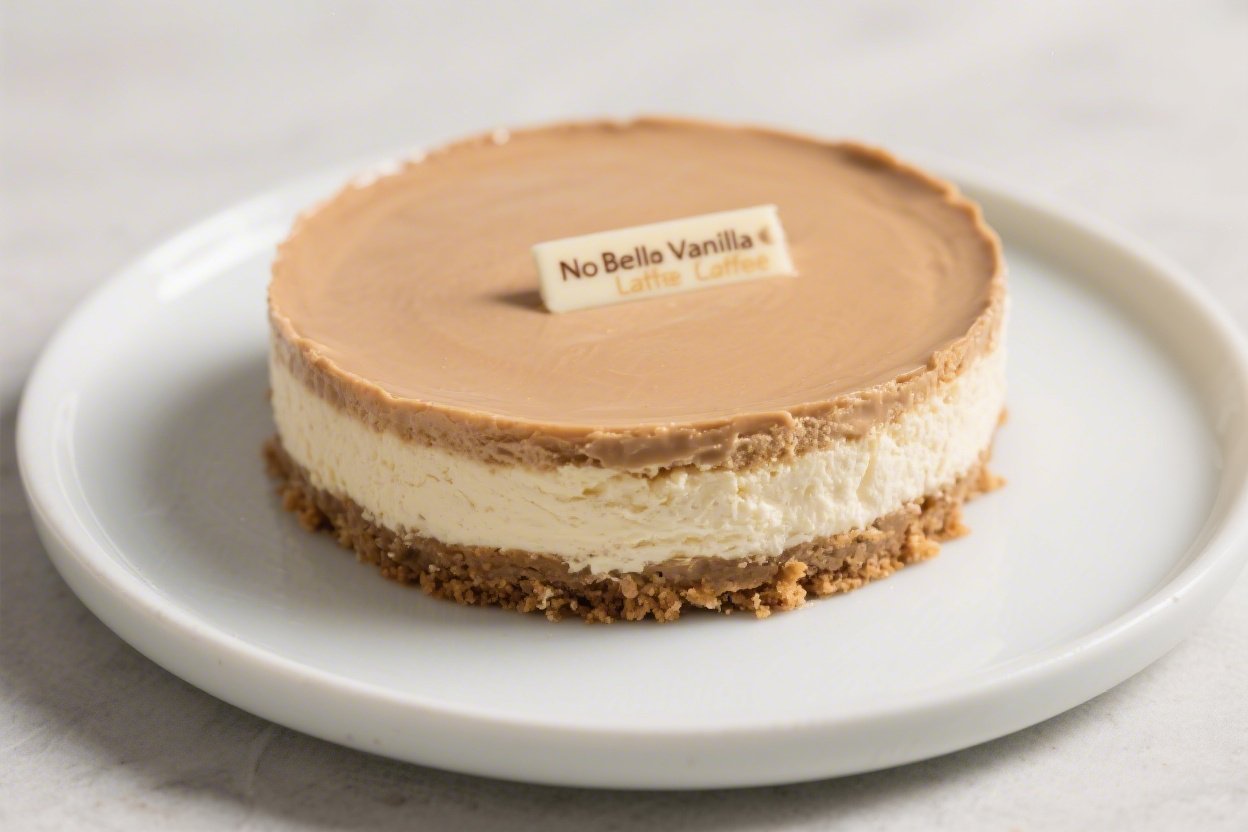
No Bake Vanilla Latte Cheesecake – Creamy, Coffee-Kissed Dessert Without the Oven
This cheesecake tastes like your favorite vanilla latte, but in sliceable, creamy form. It’s smooth, lightly sweet, and infused with real coffee and vanilla. Best of all, there’s no baking, no water baths, and no fuss.
You’ll mix, chill, and enjoy. Make it ahead for a dinner party or keep it in the fridge for a weeknight treat that feels special.
No Bake Vanilla Latte Cheesecake - Creamy, Coffee-Kissed Dessert Without the Oven
Ingredients
Method
- Prep your pan. Line the bottom of a 9-inch (23 cm) springform pan with parchment. Lightly grease the sides if you like cleaner releases. You can also use an 8-inch pan for a taller cheesecake.
- Make the crust. Pulse cookies or crackers into fine crumbs. Stir in melted butter and a pinch of salt until the texture feels like wet sand and clumps when pressed. Press firmly into the bottom of the pan using the bottom of a measuring cup.
- Chill the crust. Pop the crust into the fridge for 15 minutes (or freezer for 10) while you make the filling. This helps it set and stay crisp.
- Bloom the coffee flavor. In a small bowl, mix espresso powder with 1 to 2 teaspoons of hot water—just enough to dissolve. You want a thick, syrupy coffee concentrate, not a watery mix.
- Whip the cream. In a cold bowl, whip heavy cream with powdered sugar to medium-stiff peaks. Don’t overbeat. Set aside in the fridge.
- Beat the cream cheese. In a large bowl, beat cream cheese, granulated sugar, vanilla, and a pinch of salt until smooth and fluffy, about 2 minutes. Scrape the bowl a couple of times to avoid lumps.
- Flavor the filling. Beat in the coffee concentrate until evenly tinted and fragrant. Taste and adjust coffee strength by adding a pinch more espresso powder if you like it bolder.
- Fold in the cream. Gently fold the whipped cream into the coffee-vanilla cream cheese in three additions. Use a spatula and light strokes to keep the mixture airy.
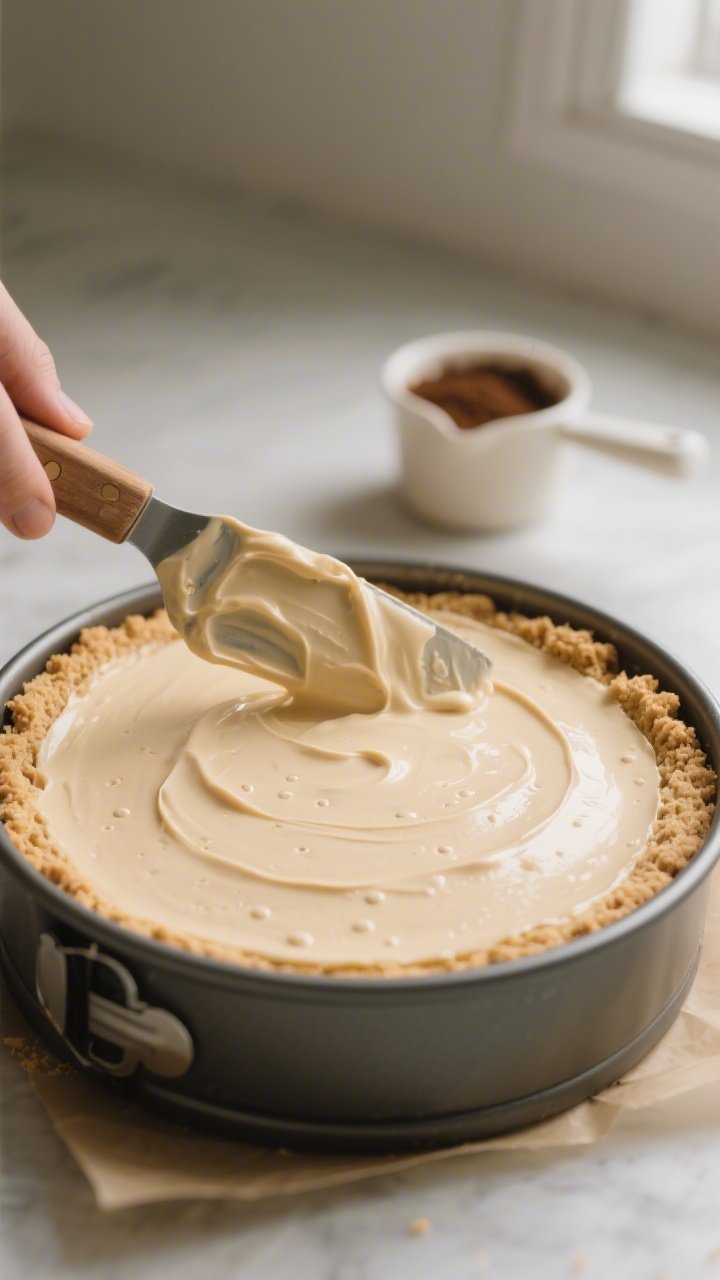
- Fill and smooth. Spoon the filling over the chilled crust and smooth the top with an offset spatula. Tap the pan gently on the counter to pop any big air bubbles.
- Chill to set. Cover and refrigerate at least 6 hours, preferably overnight. The longer chill ensures clean slices and the best texture.
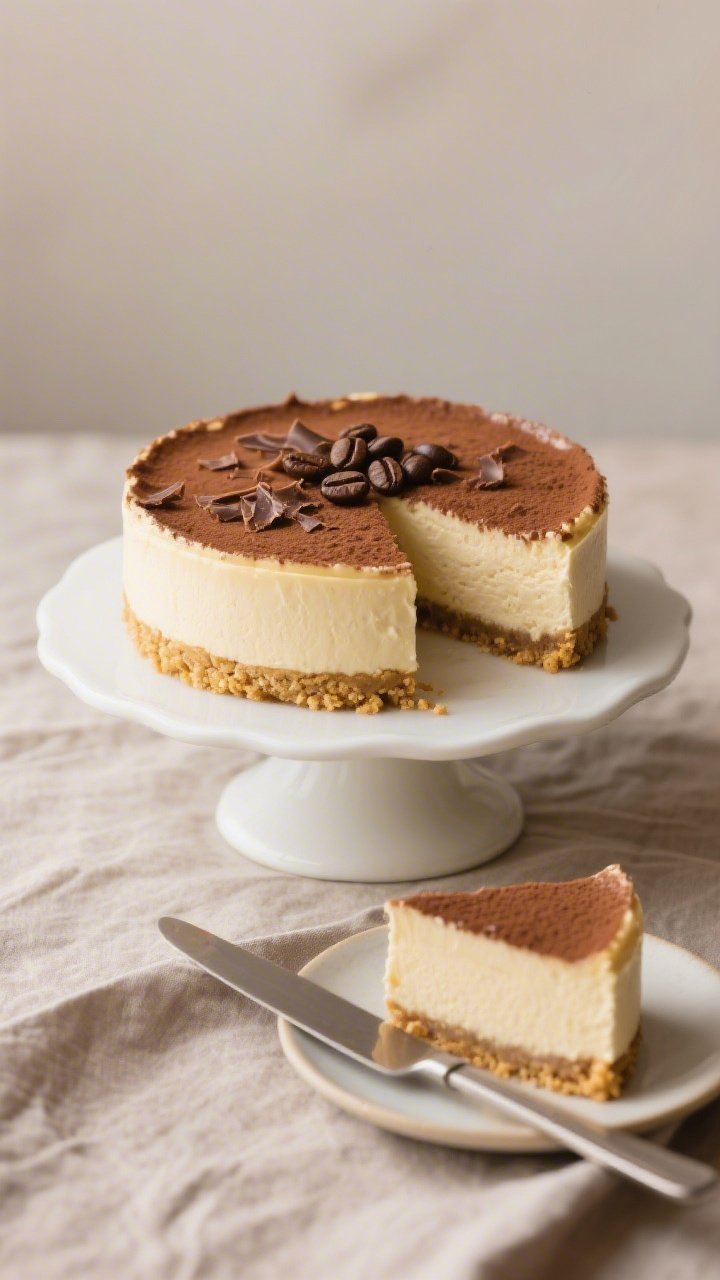
- Garnish and serve. Release the springform ring. Dust lightly with cocoa powder, add chocolate shavings, or place a few espresso beans on top. Slice with a hot, dry knife for neat edges.
Overeating is a pattern. This helps you fix that problem. A quick reset for cravings, snacking, and “I’ll start tomorrow” moments.
Built for busy home cooks who want real-life structure. Simple steps that fit meal prep, family dinners, and late-night snack attacks.
Why This Recipe Works
The base is a classic no-bake cheesecake set with whipped cream and cream cheese. That combo gives you a firm yet silky texture without needing gelatin.
Instant espresso powder dissolves effortlessly into the batter, delivering rich coffee flavor without extra liquid that can make a no-bake cake soupy. A hint of vanilla rounds everything out, giving you that latte vibe. Finally, a buttery cookie crust adds crunch and a touch of salt to balance the creaminess.
Shopping List
- Cream cheese (full-fat, blocks) – 16 oz (450 g)
- Heavy whipping cream – 1 cup (240 ml)
- Granulated sugar – 1/2 cup (100 g)
- Powdered sugar – 1/4 cup (30 g)
- Instant espresso powder or instant coffee – 2 to 3 teaspoons
- Pure vanilla extract – 2 teaspoons
- Fine sea salt – a pinch
- Plain or vanilla sandwich cookies (or graham crackers) – about 8 oz (225 g), crushed
- Unsalted butter – 5 tablespoons (70 g), melted
- Optional garnish: shaved chocolate, cocoa powder, or espresso beans
Step-by-Step Instructions
- Prep your pan. Line the bottom of a 9-inch (23 cm) springform pan with parchment.
Lightly grease the sides if you like cleaner releases. You can also use an 8-inch pan for a taller cheesecake.
- Make the crust. Pulse cookies or crackers into fine crumbs. Stir in melted butter and a pinch of salt until the texture feels like wet sand and clumps when pressed.
Press firmly into the bottom of the pan using the bottom of a measuring cup.
- Chill the crust. Pop the crust into the fridge for 15 minutes (or freezer for 10) while you make the filling. This helps it set and stay crisp.
- Bloom the coffee flavor. In a small bowl, mix espresso powder with 1 to 2 teaspoons of hot water—just enough to dissolve. You want a thick, syrupy coffee concentrate, not a watery mix.
- Whip the cream. In a cold bowl, whip heavy cream with powdered sugar to medium-stiff peaks.
Don’t overbeat. Set aside in the fridge.
- Beat the cream cheese. In a large bowl, beat cream cheese, granulated sugar, vanilla, and a pinch of salt until smooth and fluffy, about 2 minutes. Scrape the bowl a couple of times to avoid lumps.
- Flavor the filling. Beat in the coffee concentrate until evenly tinted and fragrant.
Taste and adjust coffee strength by adding a pinch more espresso powder if you like it bolder.
- Fold in the cream. Gently fold the whipped cream into the coffee-vanilla cream cheese in three additions. Use a spatula and light strokes to keep the mixture airy.
- Fill and smooth. Spoon the filling over the chilled crust and smooth the top with an offset spatula. Tap the pan gently on the counter to pop any big air bubbles.
- Chill to set. Cover and refrigerate at least 6 hours, preferably overnight.
The longer chill ensures clean slices and the best texture.
- Garnish and serve. Release the springform ring. Dust lightly with cocoa powder, add chocolate shavings, or place a few espresso beans on top. Slice with a hot, dry knife for neat edges.
Storage Instructions
- Refrigerator: Cover and chill for up to 5 days.
Keep it airtight to prevent the crust from softening.
- Freezer: Freeze whole or as slices, well-wrapped, for up to 1 month. Thaw overnight in the fridge. The texture stays creamy, though slightly firmer.
- Make-ahead tips: You can make the crust a day in advance and keep it chilled.
Assemble the cheesecake the next day and chill overnight.

Why This is Good for You
This dessert is still a treat, but it has some smart upsides. It skips heavy baking and extra sugar syrups, relying on simple ingredients and controlled sweetness. Coffee delivers flavor with almost no added calories, and a little goes a long way.
Because it’s rich and satisfying, a small slice feels indulgent, helping with portion control. You also avoid the stress of finicky baked cheesecakes, which is good for your sanity on busy days.
Pitfalls to Watch Out For
- Runny filling: If the cream isn’t whipped to medium-stiff peaks, the filling may not set. Also avoid adding too much liquid to dissolve the espresso powder.
- Lumpy texture: Use room-temperature cream cheese and beat until completely smooth before adding the whipped cream.
Cold blocks don’t blend well.
- Soft crust: Press the crust firmly and chill it before adding the filling. If your cookies are very sweet or soft, add a teaspoon more butter to help it bind.
- Bitter coffee taste: Instant espresso is strong. Start with 2 teaspoons and taste; add more only if needed.
- Gritty coffee bits: Fully dissolve the espresso powder in hot water before mixing into the batter.
Alternatives
- Crust swaps: Try chocolate wafer cookies for a mocha vibe, or speculoos/biscoff for spiced warmth.
Gluten-free grahams work well too.
- Sweeteners: Use light brown sugar in the filling for a caramel note, or swap granulated sugar with superfine sugar for quicker dissolving.
- Dairy-free: Use dairy-free cream cheese and coconut whipping cream. Choose a neutral, unsweetened variety and add a little extra vanilla.
- No coffee: For a vanilla bean version, skip the espresso and add seeds from 1 vanilla bean plus an extra 1/2 teaspoon vanilla extract.
- Gelatin set: If you want extra-firm slices for warm rooms, bloom 1 teaspoon powdered gelatin in 2 tablespoons cold water, melt gently, cool slightly, and beat into the cream cheese mixture before folding in the whipped cream.
- Mini cheesecakes: Press crust into lined muffin tins, fill, and chill 3 to 4 hours. Great for parties and portion control.
FAQ
Can I use brewed coffee instead of instant espresso powder?
Brewed coffee adds too much liquid and dilutes the filling.
If you must, reduce very strong coffee on the stove to a thick syrup and cool completely before adding. Instant espresso or coffee powder is the easiest and most reliable option.
Do I need gelatin for this cheesecake?
No. The combination of whipped cream and cream cheese sets well on its own after a long chill.
Use the optional gelatin if you’re serving outdoors in warm weather or want ultra-clean slices.
What kind of cookies work best for the crust?
Graham crackers, vanilla wafers, shortbread, or sandwich cookies (without the cream for a crisper crust) all work. Chocolate wafers are great if you like a mocha twist.
How do I prevent cracks on a no-bake cheesecake?
Cracks are rare without baking. If you see minor surface lines, they often smooth out as the cake chills.
Tapping the pan gently after filling and avoiding overmixing helps minimize air pockets.
How strong is the coffee flavor?
It’s latte-level: present but balanced by vanilla and cream. For a bolder kick, add another 1/2 to 1 teaspoon espresso powder, tasting as you go.
Can I make this less sweet?
Yes. Reduce granulated sugar in the filling to 1/3 cup and powdered sugar in the cream to 2 tablespoons.
Coffee and vanilla will still keep the flavor rounded.
How long should I chill it?
A minimum of 6 hours works, but overnight (8 to 12 hours) gives a better set and cleaner slices. Plan ahead and make it the day before serving.
What’s the best way to slice cleanly?
Use a sharp knife dipped in hot water and wiped dry between cuts. Gentle, straight-down pressure keeps edges smooth.
In Conclusion
This No Bake Vanilla Latte Cheesecake is simple, elegant, and reliably delicious.
It delivers coffeehouse flavor with minimal effort and zero oven time. Keep the ingredients on hand, and you can pull together a crowd-pleasing dessert any time. One smooth, creamy slice is all you need to feel like you treated yourself well.
Printable Recipe Card
Want just the essential recipe details without scrolling through the article? Get our printable recipe card with just the ingredients and instructions.