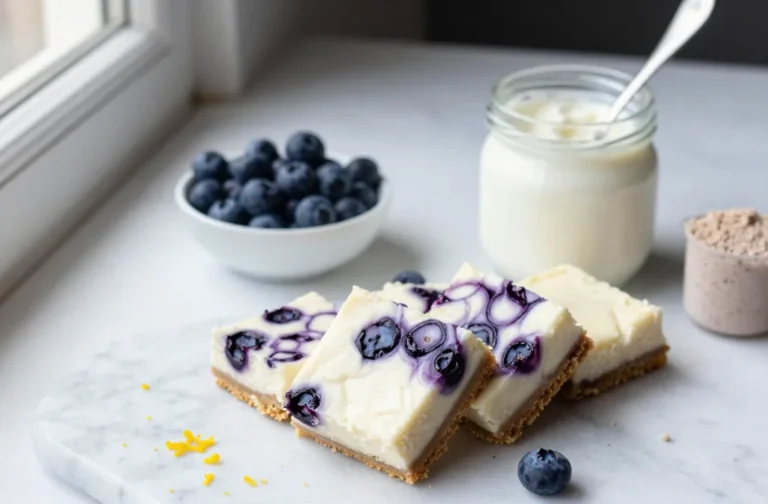
No Bake Chocolate Chip Crunch Cheesecake – Creamy, Crispy, and Effortless
This is the kind of dessert that feels like a treat and a little bit of a party trick. No oven needed, no water bath drama, and no guesswork. Just a cool, creamy cheesecake filling with pops of chocolate chips and a buttery, crunchy crust that holds it all together.
It’s simple to make, sets beautifully in the fridge, and slices like a dream. Perfect for birthdays, BBQs, or any I-need-dessert-now situation.
Ingredients
Method
- Prep the pan: Lightly grease a 9-inch springform pan or line the bottom with parchment. This makes slicing and releasing cleaner.
- Make the crust: Stir cookie crumbs, melted butter, sugar, and salt until the texture feels like damp sand. Press the mixture firmly into the bottom of the pan and slightly up the sides. Use the bottom of a glass to compact it well. Chill while you make the filling.
- Whip the cream: In a cold bowl, whip the heavy cream to firm peaks. Don’t overbeat into butter, but you want it sturdy. Set aside.
- Beat the cream cheese: In a separate bowl, beat softened cream cheese until smooth and fluffy, 1–2 minutes. Add powdered sugar, vanilla, and salt. Beat until creamy and no lumps remain.
- Lighten the filling: Gently fold the whipped cream into the cream cheese mixture in two additions. Use a spatula with slow, sweeping motions to keep it airy.
- Add the crunch and chips: Fold in mini chocolate chips and your chosen crunchy add-in. Mini chips mix more evenly and cut cleaner than full-size chips.
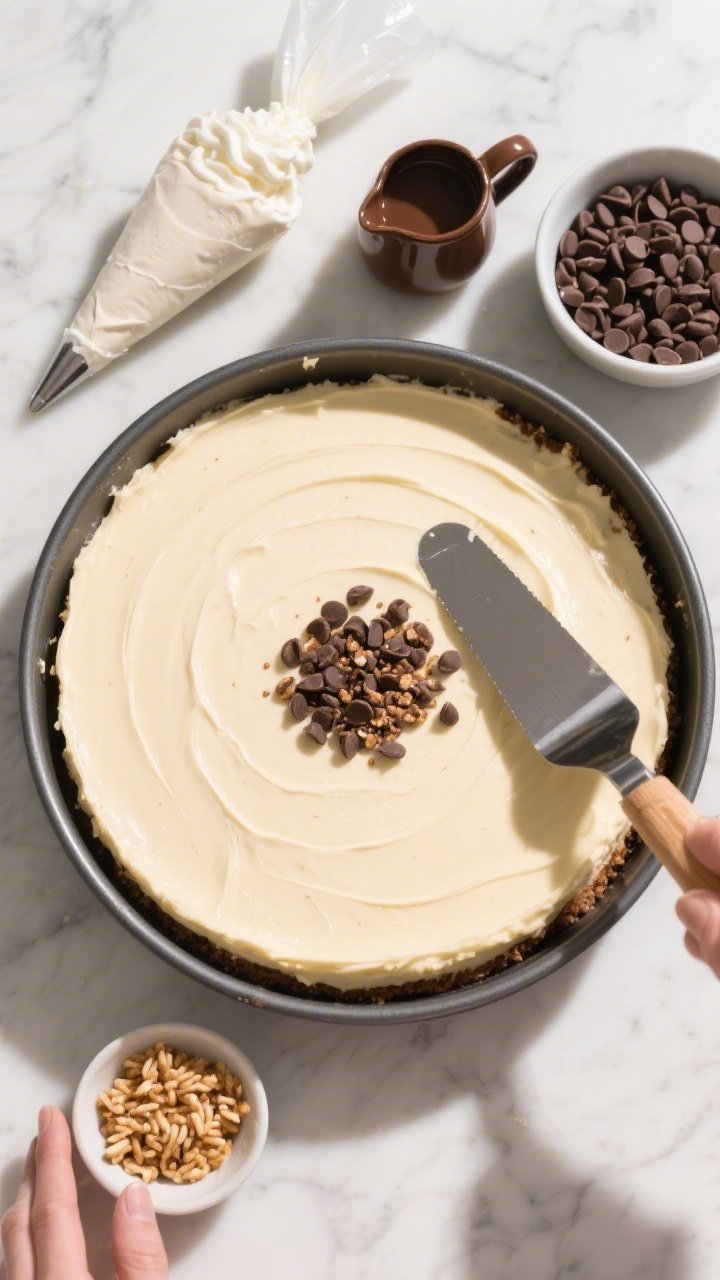
- Fill the pan: Spoon the mixture over the chilled crust. Smooth the top with an offset spatula. Tap the pan lightly on the counter to release air pockets.
- Chill to set: Cover and refrigerate for at least 6 hours, preferably overnight. The longer chill helps it slice neatly and hold its shape.
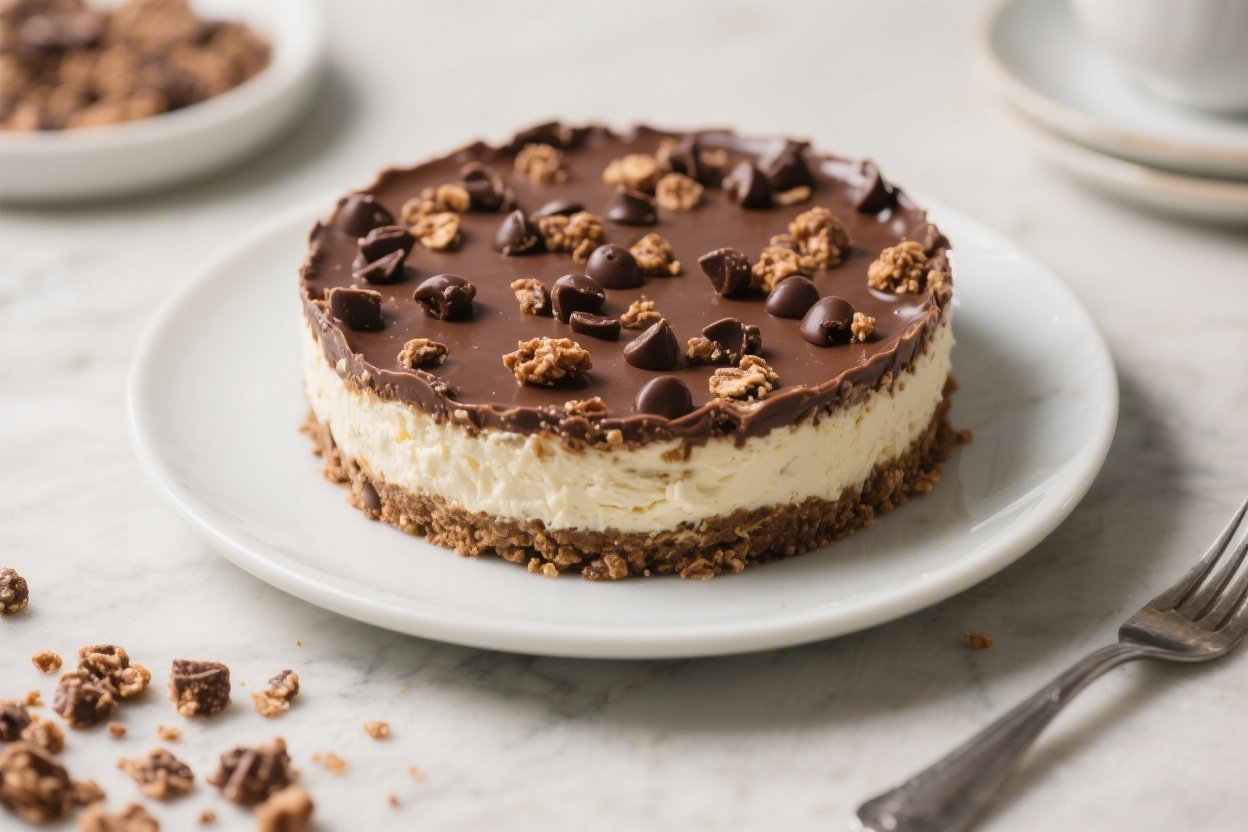
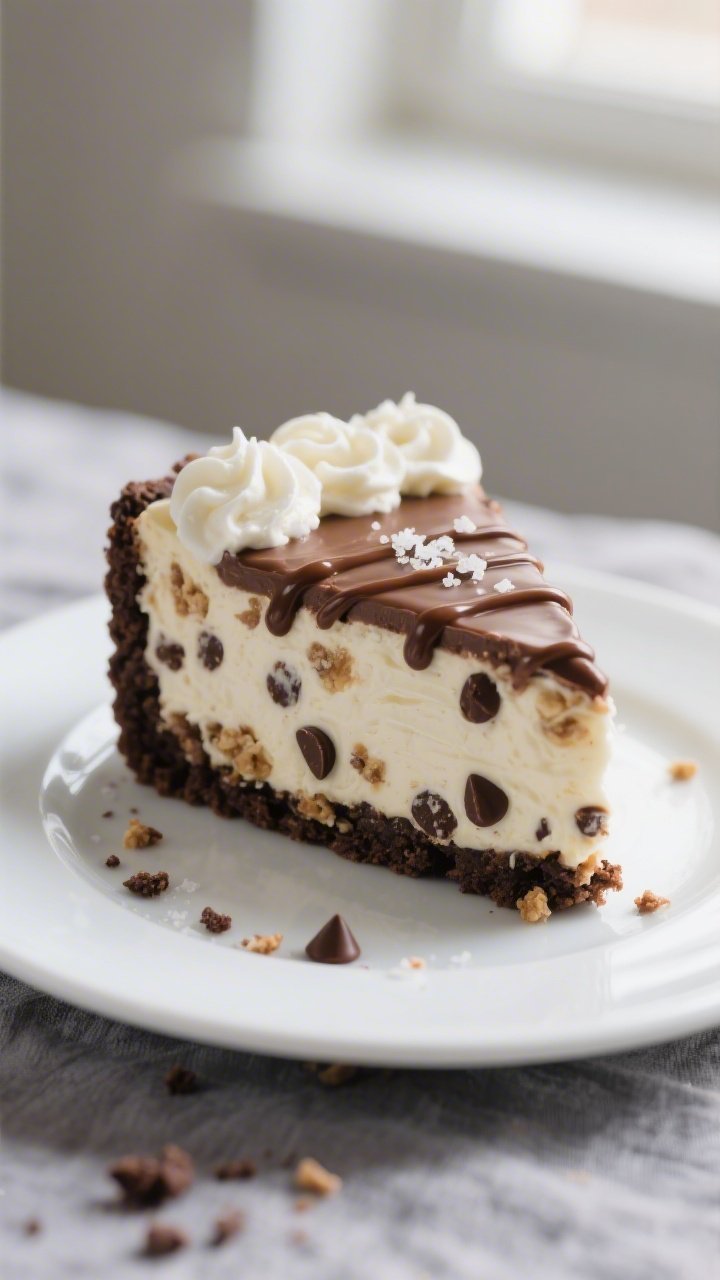
- Finish and serve: Unmold the springform ring. Add whipped cream swirls, a chocolate drizzle, extra chips, or a pinch of sea salt. Slice with a warm, clean knife, wiping between cuts.
Overeating is a pattern. This helps you fix that problem. A quick reset for cravings, snacking, and “I’ll start tomorrow” moments.
Built for busy home cooks who want real-life structure. Simple steps that fit meal prep, family dinners, and late-night snack attacks.
What Makes This Recipe So Good
- No baking required: If you can stir and chill, you can make this cheesecake.
- Crunch factor: The crust and a little crunchy mix-in give every bite texture, which balances the silky filling.
- Classic flavors: Vanilla, tangy cream cheese, and semi-sweet chocolate chips—familiar and crowd-pleasing.
- Make-ahead friendly: It needs time to chill, so you can prep it the day before and forget about it until serving.
- Easy to customize: Swap the crust, tweak the chips, or add a sauce. It’s a flexible base for all kinds of spins.
What You’ll Need
- For the crust:
- 2 cups chocolate cookie crumbs or graham cracker crumbs
- 6 tablespoons unsalted butter, melted
- 2 tablespoons granulated sugar (optional, skip if using sweet cookies)
- Pinch of fine salt
- For the filling:
- 16 ounces cream cheese, softened to room temperature
- 3/4 cup powdered sugar
- 1 teaspoon pure vanilla extract
- 1/8 teaspoon fine salt
- 1 cup cold heavy whipping cream
- 1 cup mini chocolate chips (semi-sweet or dark)
- 3/4 cup crunchy add-in (such as crushed chocolate wafer cookies, crisped rice cereal, or toffee bits)
- For topping (optional but great):
- Whipped cream for swirls or a layer on top
- Extra mini chocolate chips
- Warm chocolate sauce or ganache drizzle
- Sea salt flakes for a light finish
- Equipment:
- 9-inch springform pan (or a deep pie dish)
- Mixing bowls and hand mixer or stand mixer
- Rubber spatula
- Measuring cups/spoons
- Offset spatula (nice to have)
Instructions
- Prep the pan: Lightly grease a 9-inch springform pan or line the bottom with parchment.
This makes slicing and releasing cleaner.
- Make the crust: Stir cookie crumbs, melted butter, sugar, and salt until the texture feels like damp sand. Press the mixture firmly into the bottom of the pan and slightly up the sides. Use the bottom of a glass to compact it well.
Chill while you make the filling.
- Whip the cream: In a cold bowl, whip the heavy cream to firm peaks. Don’t overbeat into butter, but you want it sturdy. Set aside.
- Beat the cream cheese: In a separate bowl, beat softened cream cheese until smooth and fluffy, 1–2 minutes.
Add powdered sugar, vanilla, and salt. Beat until creamy and no lumps remain.
- Lighten the filling: Gently fold the whipped cream into the cream cheese mixture in two additions. Use a spatula with slow, sweeping motions to keep it airy.
- Add the crunch and chips: Fold in mini chocolate chips and your chosen crunchy add-in.
Mini chips mix more evenly and cut cleaner than full-size chips.
- Fill the pan: Spoon the mixture over the chilled crust. Smooth the top with an offset spatula. Tap the pan lightly on the counter to release air pockets.
- Chill to set: Cover and refrigerate for at least 6 hours, preferably overnight.
The longer chill helps it slice neatly and hold its shape.
- Finish and serve: Unmold the springform ring. Add whipped cream swirls, a chocolate drizzle, extra chips, or a pinch of sea salt. Slice with a warm, clean knife, wiping between cuts.
Keeping It Fresh
Cover the cheesecake tightly and store it in the fridge for up to 5 days.
If you’ve added a chocolate drizzle, it will firm up but stay tasty. For longer storage, freeze slices on a sheet pan until solid, then wrap individually. They’ll keep well for 1–2 months.
Thaw in the fridge for a few hours before serving for the best texture.

Health Benefits
- Portion control is your friend: This is a rich dessert, so smaller slices still satisfy. Balanced portions help manage sugar and calorie intake.
- Protein and calcium: Cream cheese and heavy cream offer some protein and calcium, which support muscles and bones.
- Customizable sweetness: You can reduce the powdered sugar a bit or choose dark chocolate chips for a slightly lower sugar option without losing flavor.
- Gluten-free friendly: Use gluten-free cookie crumbs and check chocolate chip labels to make it gluten-free if needed.
Pitfalls to Watch Out For
- Too-soft cream cheese: Room temperature is good, but overly warm cream cheese can make the filling loose. Aim for cool-room-temp, not melty.
- Underwhipped or overwhipped cream: Soft peaks won’t hold the structure; overwhipped turns grainy.
Firm peaks give lift while staying smooth.
- Skimping on chill time: If you cut too soon, the slice will slump. Overnight chilling is the safest bet.
- Crust that crumbles: You need enough butter and pressure when pressing. If using very dry crumbs, add another tablespoon of melted butter.
- Moisture in the crunch: Some add-ins (like crisped rice) can soften over time.
For maximum crunch, save a handful to sprinkle on top right before serving.
Variations You Can Try
- Peanut butter swirl: Warm 1/3 cup peanut butter and swirl it into the filling before chilling. Top with chopped peanuts and mini chips.
- Mint chocolate: Add 1/2 teaspoon peppermint extract to the filling and use chocolate wafer cookies for the crust. Garnish with crushed mint candies.
- Salted caramel: Drizzle caramel sauce between two thin layers of filling and over the top.
Finish with flaky sea salt.
- Mocha crunch: Dissolve 1 teaspoon instant espresso in 1 teaspoon hot water, cool, and mix into the filling. Use dark chocolate chips and chocolate cookie crust.
- Gluten-free version: Use gluten-free chocolate sandwich cookies or graham-style crackers and check all labels.
- Lighter option: Swap half the cream cheese for Greek yogurt cream cheese and use slightly less powdered sugar. Expect a softer set but still delicious.
FAQ
Can I use whipped topping instead of heavy cream?
Yes, you can fold in about 2 1/2 cups of thawed whipped topping.
The texture will be a bit lighter and sweeter, and it may set faster. Still chill for at least 4–6 hours for clean slices.
What’s the best pan if I don’t have a springform?
A deep pie dish or an 8-inch square pan works. Line with parchment, leaving overhang for easy lifting.
Keep the crust slightly thicker to help it hold when sliced.
Why is my filling lumpy?
Lumps usually come from cold cream cheese. Beat the cream cheese until completely smooth before adding sugar and vanilla. If needed, pass the mixture through a fine mesh sieve or beat a little longer to smooth it out before folding in the cream.
Can I make it ahead?
Absolutely.
This cheesecake is ideal for making a day in advance. It not only holds well, it actually improves as it chills. Add any whipped cream or drizzle just before serving for the best look and texture.
Which chocolate chips are best?
Mini semi-sweet chips distribute evenly and slice cleanly.
Dark chips add a deeper flavor, while milk chocolate makes it sweeter. You can also chop a chocolate bar for a more rustic texture.
How do I keep the crust from sticking?
Use parchment on the bottom and lightly grease the sides. After chilling, run a thin knife around the edge before releasing the springform.
A very firm press when forming the crust also helps it release as a single layer.
Can I make this dairy-free?
Yes. Use a dairy-free cream cheese, coconut-based whipped topping, and dairy-free chocolate chips. Choose a vegan cookie for the crust and use coconut oil instead of butter.
Chill time may be a little longer for a full set.
In Conclusion
No Bake Chocolate Chip Crunch Cheesecake gives you the best of both worlds: creamy, dreamy filling and a satisfying crunch, all without turning on the oven. It’s reliable, customizable, and easy to share. Whether you keep it classic or dress it up with swirls and drizzles, this dessert is a keeper.
Make it once, and you’ll find yourself planning excuses to make it again.
Printable Recipe Card
Want just the essential recipe details without scrolling through the article? Get our printable recipe card with just the ingredients and instructions.