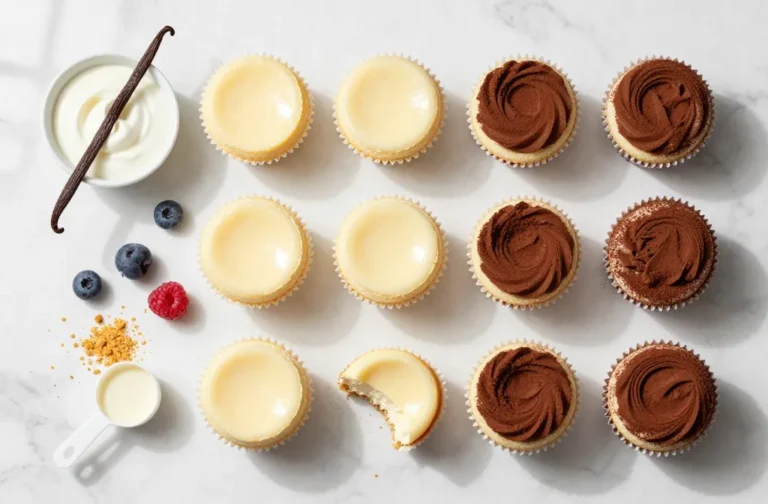
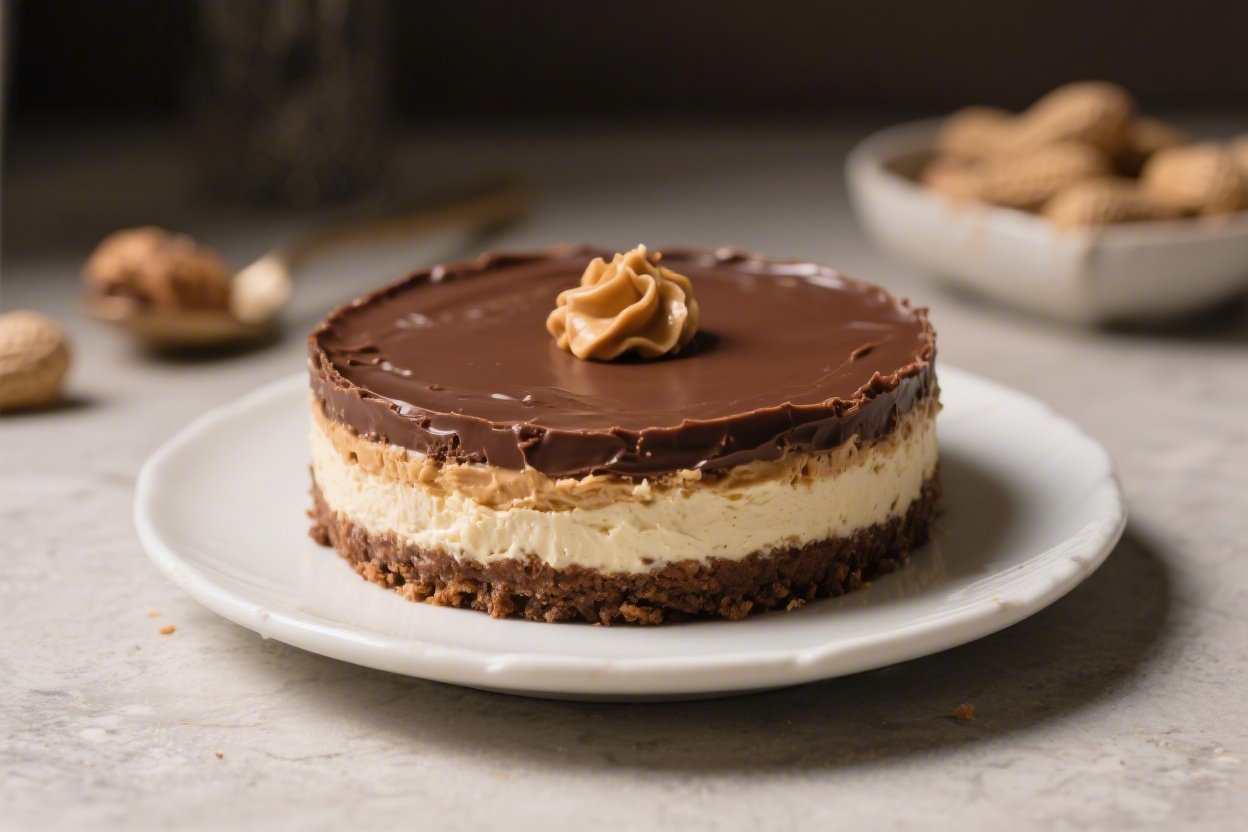
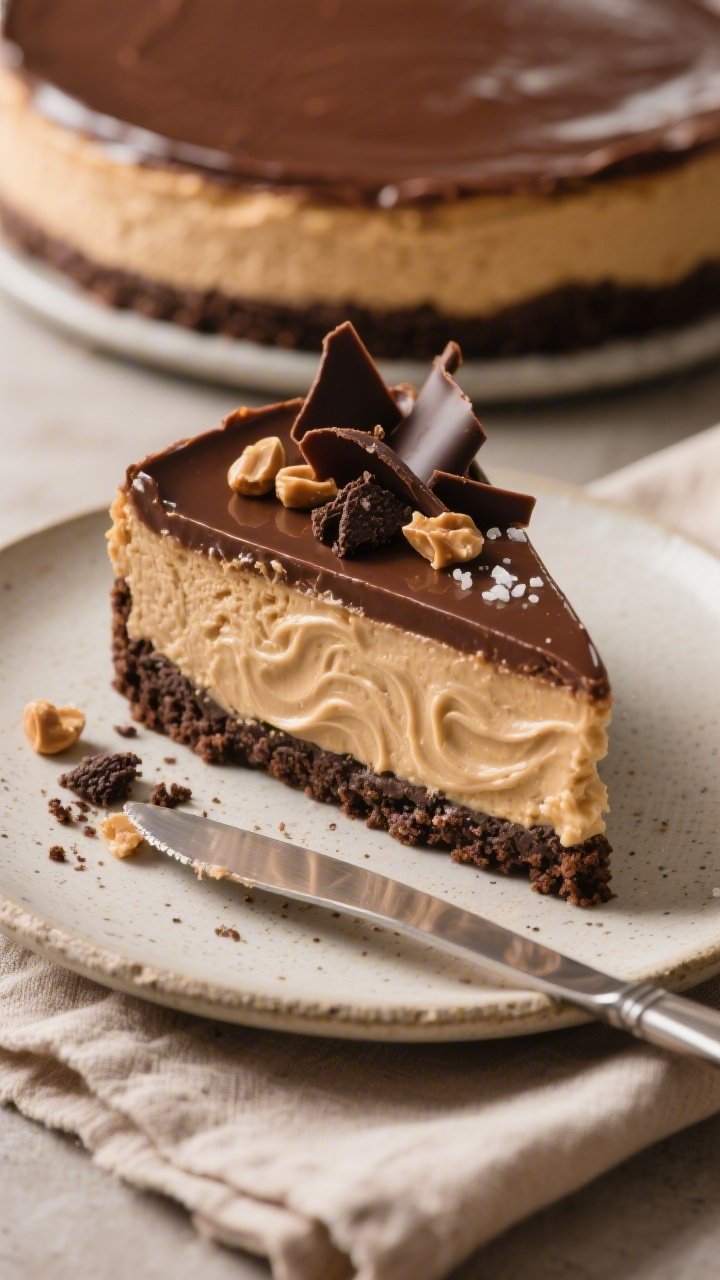
No Bake Chocolate Peanut Butter Cheesecake – Creamy, Rich, and Effortless
If you love the classic combo of chocolate and peanut butter, this no bake cheesecake will hit the spot. It’s silky, rich, and surprisingly easy to pull together—no oven, no water bath, no fuss. You get a crunchy cookie crust, a fluffy peanut butter cheesecake layer, and a glossy chocolate topping.
It’s great for potlucks, birthdays, or a weeknight treat you make ahead. With a few simple ingredients and a little chill time, you’ll have a dessert that feels special without a lot of stress.
Ingredients
Method
- Prep the pan: Line the bottom of a 9-inch springform pan with parchment. Lightly grease the sides for easier release.
- Make the crust: Stir cookie crumbs with melted butter until evenly moistened. Press firmly into the bottom of the pan using the bottom of a measuring cup to compact. Chill while you make the filling.
- Soften the cream cheese: Ensure cream cheese is at room temperature. This prevents lumps and keeps the filling ultra-smooth.
- Beat the base: In a large bowl, beat cream cheese, peanut butter, powdered sugar, vanilla, and a pinch of salt until smooth and fluffy, 2–3 minutes. Scrape the bowl to catch any streaks.
- Whip the cream: In a separate, chilled bowl, whip 1 cup heavy cream to medium-stiff peaks. Don’t overwhip; it should look billowy and hold lines.
- Fold it in: Gently fold the whipped cream into the peanut butter mixture in two additions until no white streaks remain. This keeps the filling light.
- Fill the crust: Spoon the filling over the crust and smooth the top with an offset spatula. Tap the pan lightly on the counter to settle air pockets.
- Chill to set: Cover and refrigerate for at least 6 hours, preferably overnight. The longer rest gives a cleaner slice and deeper flavor.
- Make the ganache: Heat 1/2 cup heavy cream until steaming (not boiling). Pour over 1 cup chocolate chips in a heatproof bowl. Let sit 2 minutes, then stir until glossy and smooth. Cool to room temperature so it’s pourable but not hot.
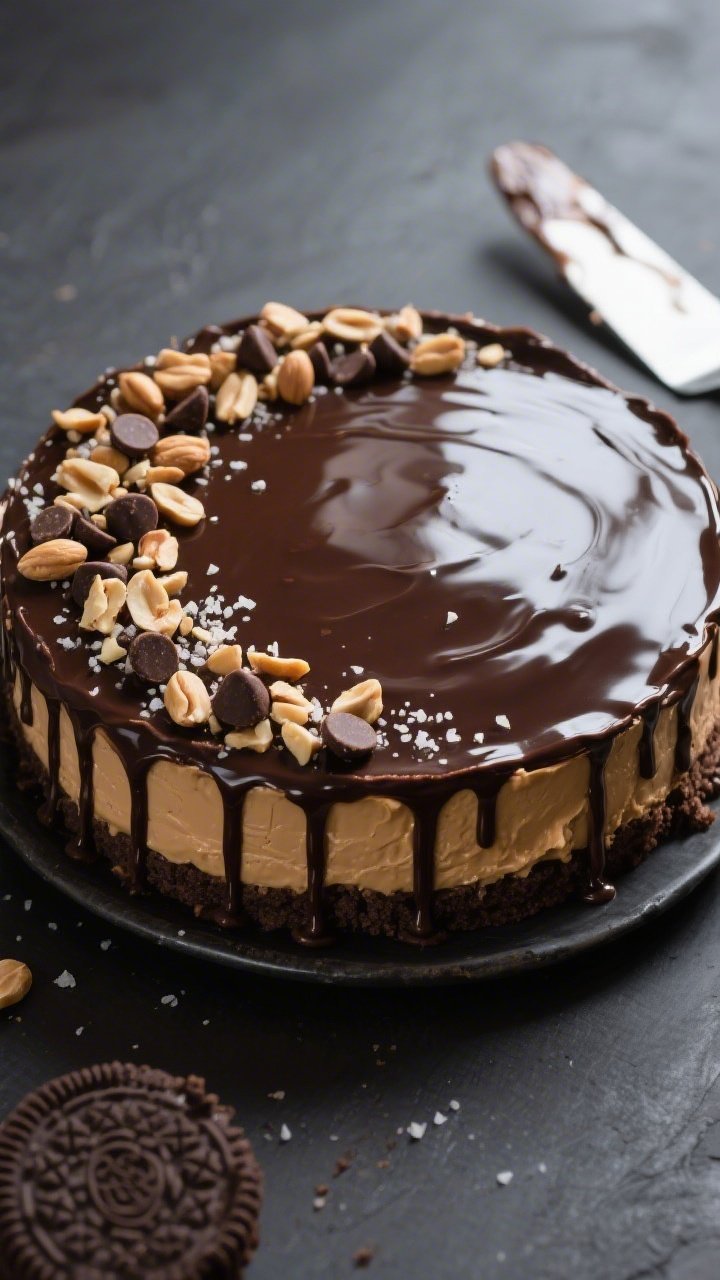
- Top the cheesecake: Remove the chilled cheesecake from the fridge. Pour the cooled ganache over the top, tilting the pan to spread. For a drip edge, nudge a little over the sides with a spoon.
- Add crunch (optional): Sprinkle chopped peanuts, mini chips, or flaky salt while the ganache is still soft. Chill 30–45 minutes to set the topping.
- Slice and serve: Run a warm knife around the pan edge, then release the ring. For clean slices, wipe the knife between cuts.
Overeating is a pattern. This helps you fix that problem. A quick reset for cravings, snacking, and “I’ll start tomorrow” moments.
Built for busy home cooks who want real-life structure. Simple steps that fit meal prep, family dinners, and late-night snack attacks.
What Makes This Special
- No oven required: The filling sets in the fridge, so it’s perfect for warm days or busy schedules.
- Balanced flavor: The peanut butter is front and center, with just enough chocolate to make it indulgent without being overwhelming.
- Dreamy texture: The filling is light and mousse-like, thanks to whipped cream folded into a creamy cheesecake base.
- Make-ahead friendly: It tastes even better after resting overnight, making it stress-free for entertaining.
- Easy to customize: Adjust sweetness, swap the crust, or add salty crunch on top—this recipe is flexible.
Shopping List
- Chocolate cookie crumbs: 2 cups (from chocolate wafer cookies or sandwich cookies; remove filling if using sandwich cookies)
- Unsalted butter: 6 tablespoons, melted
- Cream cheese: 16 ounces (two 8-ounce blocks), full-fat, softened
- Peanut butter: 3/4 cup, creamy (not natural; see notes for alternatives)
- Powdered sugar: 3/4 cup, sifted
- Vanilla extract: 1 teaspoon
- Salt: A pinch
- Heavy cream: 1 cup, cold (or use whipped topping, 2 cups)
- Dark or semisweet chocolate chips: 1 cup
- Heavy cream (for ganache): 1/2 cup
- Optional toppings: Chopped roasted peanuts, mini chocolate chips, shaved chocolate, flaky salt, crushed peanut butter cups
Step-by-Step Instructions
- Prep the pan: Line the bottom of a 9-inch springform pan with parchment. Lightly grease the sides for easier release.
- Make the crust: Stir cookie crumbs with melted butter until evenly moistened.
Press firmly into the bottom of the pan using the bottom of a measuring cup to compact. Chill while you make the filling.
- Soften the cream cheese: Ensure cream cheese is at room temperature. This prevents lumps and keeps the filling ultra-smooth.
- Beat the base: In a large bowl, beat cream cheese, peanut butter, powdered sugar, vanilla, and a pinch of salt until smooth and fluffy, 2–3 minutes.
Scrape the bowl to catch any streaks.
- Whip the cream: In a separate, chilled bowl, whip 1 cup heavy cream to medium-stiff peaks. Don’t overwhip; it should look billowy and hold lines.
- Fold it in: Gently fold the whipped cream into the peanut butter mixture in two additions until no white streaks remain. This keeps the filling light.
- Fill the crust: Spoon the filling over the crust and smooth the top with an offset spatula.
Tap the pan lightly on the counter to settle air pockets.
- Chill to set: Cover and refrigerate for at least 6 hours, preferably overnight. The longer rest gives a cleaner slice and deeper flavor.
- Make the ganache: Heat 1/2 cup heavy cream until steaming (not boiling). Pour over 1 cup chocolate chips in a heatproof bowl.
Let sit 2 minutes, then stir until glossy and smooth. Cool to room temperature so it’s pourable but not hot.
- Top the cheesecake: Remove the chilled cheesecake from the fridge. Pour the cooled ganache over the top, tilting the pan to spread.
For a drip edge, nudge a little over the sides with a spoon.
- Add crunch (optional): Sprinkle chopped peanuts, mini chips, or flaky salt while the ganache is still soft. Chill 30–45 minutes to set the topping.
- Slice and serve: Run a warm knife around the pan edge, then release the ring. For clean slices, wipe the knife between cuts.
Keeping It Fresh
Store the cheesecake covered in the fridge for up to 5 days.
A cake carrier or an inverted bowl works well to protect the top from condensation. For longer storage, freeze slices on a sheet pan until firm, then wrap tightly and store up to 2 months.
Thawing tip: Thaw wrapped slices in the fridge overnight, then unwrap to prevent moisture from pooling on the ganache. The texture stays velvety and the crust holds up.

Health Benefits
- Protein and healthy fats: Peanut butter provides plant-based protein and monounsaturated fats that help with satiety.
- Calcium: Cream cheese and heavy cream contribute calcium for bone health.
- Antioxidants: Dark chocolate contains flavanols that support heart health in moderation.
- Portion control: This dessert is rich.
A small slice satisfies, helping you enjoy it without overdoing it.
Note: If you need to reduce sugar, you can swap powdered sugar for a powdered sugar substitute designed for baking, and choose dark chocolate with a higher cacao percentage.
What Not to Do
- Don’t use natural peanut butter that separates: The oil can cause the filling to loosen and weep. Use a no-stir creamy peanut butter for best structure.
- Don’t skip softening cream cheese: Cold cream cheese leads to lumps that never fully mix out.
- Don’t pour hot ganache on the filling: Heat can melt the top layer and create streaks. Cool the ganache before topping.
- Don’t rush the chill: Under-chilling makes slicing messy and the texture too loose.
- Don’t overwhip the cream: Grainy, overwhipped cream won’t fold smoothly and can deflate the filling.
Recipe Variations
- Oreo crust: Use chocolate sandwich cookies, filling included, and reduce butter to 4 tablespoons since the cream adds moisture.
- Gluten-free: Choose gluten-free chocolate wafers or almond flour (1 3/4 cups) with 5 tablespoons butter and 2 tablespoons cocoa powder.
- Peanut-free: Swap peanut butter for creamy almond butter or sunflower seed butter.
Choose brands with a stable, no-stir texture.
- Lighter version: Replace half the cream cheese with Greek yogurt cream cheese and use 2/3 cup powdered sugar. It’ll be slightly tangier and lighter.
- Marble effect: Reserve 1/2 cup of the filling and whisk in 2 tablespoons melted, cooled chocolate. Dollop over the top and swirl with a skewer before chilling.
- Salted pretzel crust: Mix 2 cups finely crushed pretzels with 6 tablespoons butter and 2 tablespoons brown sugar for a sweet-salty crunch.
- Peanut butter cup layer: Scatter chopped mini peanut butter cups over the crust before adding the filling for bonus pockets of chocolate.
FAQ
Can I make this without a springform pan?
Yes.
Use a 9-inch deep-dish pie plate or an 8×8-inch square pan lined with parchment for easy lifting. Slices may be shorter, but it will taste just as good.
How do I fix a lumpy filling?
If you see lumps after mixing the cream cheese and peanut butter, beat the mixture a bit longer before folding in the whipped cream. A quick pass with a hand mixer on low helps smooth it out.
Can I use natural peanut butter?
You can, but results vary.
If using natural, choose a well-stirred, no-drip brand and add 1–2 tablespoons more powdered sugar to help stabilize. Expect a slightly softer set.
What chocolate works best for the ganache?
Semisweet or dark chocolate (50–60% cacao) melts smoothly and balances the sweetness. Milk chocolate works but will make the topping sweeter and softer.
How long does it need to chill?
At least 6 hours for a clean slice, though overnight is ideal.
If you’re short on time, chill in the coldest part of your fridge and avoid opening the door.
Can I make this ahead?
Absolutely. Make the cheesecake up to 2 days in advance. Add toppings the day you serve if you want nuts to stay extra crunchy.
What if I don’t have powdered sugar?
Blend granulated sugar in a high-speed blender until very fine, then measure.
Add a teaspoon of cornstarch if you want to mimic store-bought powdered sugar’s texture.
Why is my crust crumbly?
It likely needs more butter or firmer packing. Add another tablespoon of melted butter, press firmly, and chill the crust at least 20 minutes before filling.
Wrapping Up
This No Bake Chocolate Peanut Butter Cheesecake delivers big flavor with minimal effort. The crust is crisp, the filling is cloud-like, and the chocolate topping ties it all together.
Keep the steps simple, give it time to chill, and you’ll have a crowd-pleasing dessert that’s as reliable as it is delicious. Make it once, and it’ll quickly become your go-to make-ahead treat.
Printable Recipe Card
Want just the essential recipe details without scrolling through the article? Get our printable recipe card with just the ingredients and instructions.